
DIY embroidered denim is a timeless way to customize jeans, jackets, or bags with a personal touch, letting your unique style shine through visible stitches, textures, and color choices. For readers seeking guidance, a denim embroidery tutorial and clear steps on how to embroider on jeans make this craft approachable, even for complete beginners, by breaking the process into manageable moves. You’ll discover DIY jeans embroidery ideas spanning floral stems, geometric motifs, initials, and playful patches, and a quick overview of embroidery stitches for denim to help you match technique to fabric. The guide also touches on embroidery on denim, choosing threads, needles, and stabilizers that hold up to wear, as well as practical tips to prevent puckering and keep colors vibrant. Whether you are starting on a pocket, a sleeve panel, or a back yoke, this beginner-friendly approach blends practicality with creative expression, so you can wear or gift a personalized piece with confidence.
Alternative phrasing for this craft centers on personalized jean embellishment through thread art and decorative stitching on durable denim. Think of fabric decoration techniques that elevate everyday wear, from embroidery on jeans to stitched patches and surface ornamentation. LSI-friendly terms such as garment embroidery on rugged denim, hand embroidery on denim, and beginner-friendly stitches on fabric help explain the concept without repetitive phrasing. By emphasizing color, texture, and secure finishes, you can create pieces that are both durable and expressive. Whether your project starts with a small pocket accent or expands to a full-panel design, the ideas translate across jeans, jackets, and tote bags.
DIY Embroidered Denim: Essential Tools and Setup
Starting a DIY embroidered denim project begins with gathering the right tools and setting up a workspace that invites careful, patient stitching. You’ll want a clean denim item—jeans, a jacket, or a bag—plus a hoop or small frame to keep the fabric taut. Select denim-appropriate needles such as 80/12 or 90/14, and choose embroidery floss, perle cotton, or rayon threads in colors that will pop against the indigo or black base. Sharp scissors, a water-soluble marking pen or chalk, and a stabilizer or tear-away stabilizer for larger designs round out the core kit. This setup echoes the practical approach found in a denim embroidery tutorial, where clean lines and steady tension set the foundation for durable results.
Create a comfortable, well-lit workspace and consider organizing your tools within easy reach so you can work in segments. If you don’t have stabilizer, a scrap of heavy interfacing placed under the stitching area can help prevent puckering. Keep a light source and magnifier handy for tiny details, and note that a stable surface makes hand embroidery on denim feel less strenuous. With these basics in place, you’re ready to focus on the craft itself rather than on hunting for supplies during a session.
Planning Your Design: Placement, Color, and Pattern Transfer for Denim
Choosing the right design is half the fun and half the skill. Look for motifs that fit the surface—florals, geometric shapes, initials, or minimalist landscapes work well on denim. For beginners, start with a small motif that can be completed in a single session, then build up to more complex ideas. Deciding where to place the design matters too: a pocket corner, back panel, or sleeve can all become a stylish focal point. This planning phase aligns with the mindset behind a denim embroidery tutorial, where thoughtful placement ensures the design enhances the garment rather than overpowering it.
When it comes to color, denim’s deep, neutral base makes bright or pastel threads sing. A two- to four-color palette is usually enough to create contrast without becoming chaotic. Cotton embroidery floss is beginner-friendly, but perle cotton or rayon threads offer more sheen and a denser finish for denim. Plan your pattern transfer in stages for larger designs to maintain proportion and clean lines as you work, keeping in mind that even simple marks can guide a polished final piece.
Core Stitches for Denim: Embroidery Stitches for Denim that Last
A solid grasp of stitches is essential for durable denim embroidery. Start with outlines using backstitch or stem stitch to achieve crisp edges and smooth curves that sit neatly on the fabric. Satin stitch works well for filled areas, while long-and-short stitches provide subtle shading along petals or leaves. French knots can anchor centers and small points, and lazy daisy stitches offer quick floral accents. These stitches are all central to the embroidery stitches for denim repertoire and help create a sturdy, long-lasting design.
As you build your piece, pay attention to tension and stitch density. Denim’s thickness varies near seams and pockets, so slower, even stitches reduce distortion. Layering color gradually adds dimension without overloading the fabric, and varying stitch length can imply movement without crowding the surface. Practice with a scrap swatch to refine your technique, keeping in mind that hand embroidery on denim rewards patience and deliberate work.
Creative Ideas: DIY Jeans Embroidery Ideas to Personalize Your Wardrobe
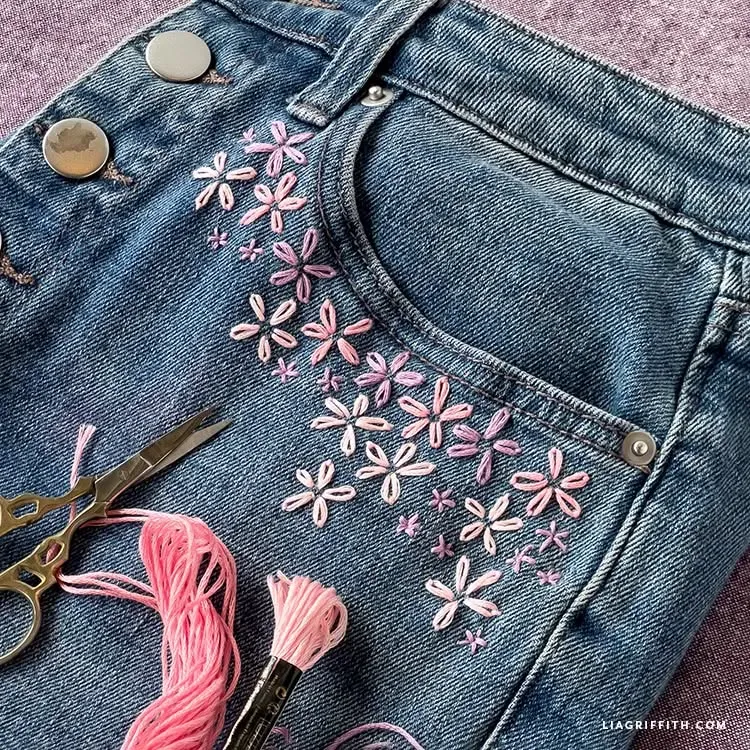
If you’re looking for inspiration, start with small accents on pockets, delicate stems, or tiny geometric motifs that won’t overwhelm the garment. Monograms or initials placed on a back collar or inside pocket offer a personalized touch that remains tasteful and wearable. Patches created from contrasting denim or fabric scraps bring a layered, DIY aesthetic that complements almost any jacket, jeans, or tote. These ideas align with the spirit of DIY jeans embroidery ideas, encouraging experimentation while staying practical for everyday wear.
The designs you choose can be tailored to the garment’s style, whether you prefer floral delicacy, minimalist geometry, or nature-inspired scenes. The beauty of denim embroidery lies in its versatility—start with a simple motif and gradually expand to larger projects, keeping the colors cohesive and the stitches well spaced. This flexibility is why many crafters reach for the denim embroidery approach again and again, transferring your ideas from concept to wearable art.
A Simple Step-by-Step Tutorial: Start to Finish on Denim
Begin with a clearly chosen motif and plan its placement on the surface. Lightly transfer the pattern with a water-soluble pen or chalk, then secure the fabric in a hoop to minimize movement. Outline the design first with an appropriate backstitch or stem stitch to establish crisp edges, ensuring even tension for a smooth foundation—the core idea behind a reliable how to embroider on jeans workflow.
Next, fill the shapes using satin or long-and-short stitches, layering colors to build depth. Add small details with specialty stitches like French knots or lazy daisies, then secure all threads at the back and erase transfer lines if needed. Finish by giving the piece a gentle wash to remove markings, press from the back with a cloth, and let it dry flat. With these steps, you’ll complete a wearable denim embroidery project that demonstrates a practical, beginner-friendly approach and serves as a solid example of hand embroidery on denim.
Care, Finishing, and Longevity: Keeping Your DIY Embroidered Denim Looking Fresh
Once your embroidery is complete, care matters as much as the stitching itself. Wash denim embroidery gently in cold water and air dry to preserve color and stitch integrity. Use a mild detergent and avoid high heat, which can cause colors to fade or threads to distort over time. Following best practices for embroidery stitches for denim helps ensure your piece remains vibrant and durable through regular wear and washes.
To extend the life of your project, consider finishing touches like reinforcing edge lines and choosing a backing fabric for larger motifs to prevent fraying. When displaying or gifting, think about how it will be worn—perhaps on a jacket back panel or a tote—and plan for easy care. Press from the back with a cloth to protect stitches, and enjoy the sense of achievement that comes with a well-crafted, long-lasting DIY embroidered denim item.
Frequently Asked Questions
What is DIY embroidered denim and how do I start a project?
DIY embroidered denim is a handmade decoration technique for jeans, jackets, or bags. Start with a small motif on a clean denim item and gather basic supplies such as a hoop, denim needles, embroidery floss or perle cotton, scissors, a water soluble marker, and stabilizer. Choose a simple design, transfer it to the fabric, stabilize the surface, outline with a clean stitch, fill with satin or long and short stitches, and finish by securing threads.
Which embroidery stitches for denim work best for beginners in hand embroidery on denim?
For denim start with backstitch for outlines, stem stitch for curves, satin stitch for fills, and long and short stitches for shading. Keep thread lengths short and maintain even tension to prevent puckering. Practice on scrap denim before starting your main project.
What are some DIY jeans embroidery ideas to try?
Small pocket accents and monograms are classic DIY jeans embroidery ideas. Floral stems or geometric patches on a pocket, cuff, or yoke provide charm without overwhelming the piece. These ideas let you customize a jacket, jeans, or tote with a personal touch.
How do I transfer a pattern for a denim embroidery tutorial?
In a denim embroidery tutorial style, lightly mark your design with a water soluble pen and transfer it in sections for larger motifs. Stabilize the area with tear away stabilizer or interfacing to prevent puckering and check alignment as you work.
What supplies do I need for hand embroidery on denim?
Essentials include a denim item, embroidery hoop, sharp denim needles (80/12 or 90/14), embroidery floss or perle cotton, scissors, a water soluble marking pen, fabric stabilizer, and a good light source. Optional tools like a thimble or needle threader can help manage threads more easily.
How should I care for and finish DIY embroidered denim to keep it durable?
Finish by securing all threads and washing the garment in cold water, then air dry to protect stitches. Iron from the back with a cloth and avoid high heat; reinforce edge lines near seams for durability and longevity.
| Topic | Key Points |
|---|---|
| Overview | DIY embroidered denim is a timeless way to customize jeans, jackets, or bags with color, texture, and a personal story. Accessible for beginners. Uses simple stitches and common supplies to create a durable, stylish design. |
| Materials | Denim item; embroidery hoop or frame; embroidery needles sized for denim (80/12 or 90/14); embroidery floss, perle cotton, or rayon threads; scissors; water-soluble marking pen or chalk; fabric stabilizer or tear-away stabilizer; good light (loupe if needed). Optional: thimble, ruler, needle threader, and fabric glue stick for pattern placement. |
| Design planning | 9-step approach: choose a design that fits the surface and skill level; decide on color and thread type; plan placement and transfer; stabilize the fabric; prepare your needle and thread; start with the outline; fill areas; add detail with specialty stitches; finishing touches. |
| Stitches for denim | Backstitch; Stem stitch; Satin stitch; Long‑and‑short stitch; French knots; Lazy daisy — good for outlines, fills, shading, and texture on denim. |
| Working with denim | Denim is durable but varies in thickness near seams; keep tension even; use a hoop or stabilizer; stitch slowly and deliberately near thick areas. |
| Tips & troubleshooting | Use a denim needle; keep fabric taut; cut shorter thread lengths; test stitches on scrap; re-check for puckering and alignment; plan color order to minimize thread changes; wash care: cold, gentle wash and air dry to preserve stitches. |
| Inspiration & ideas | Small pocket accents; monograms; patches with contrasting fabric; themed designs such as floral, geometric, or nature scenes adaptable to many denim projects. |
| Finishing & care | Size motifs to fit surface; use color strategically; ensure durability; consider backing for patches; explore display finishing options. |
Summary
DIY embroidered denim offers a creative pathway to personalize everyday pieces, transforming jeans, jackets, or totes into one-of-a-kind wearables. This overview emphasizes planning, simple stitching, and thoughtful finishing to produce durable results that withstand wear and washing. With careful design, suitable materials, and patient practice, you can grow from a simple pocket accent to larger projects that showcase your personal style. Denim’s versatility and the approachable nature of hand embroidery invite you to experiment with color, texture, and motifs, turning ordinary items into cherished, handmade treasures.