
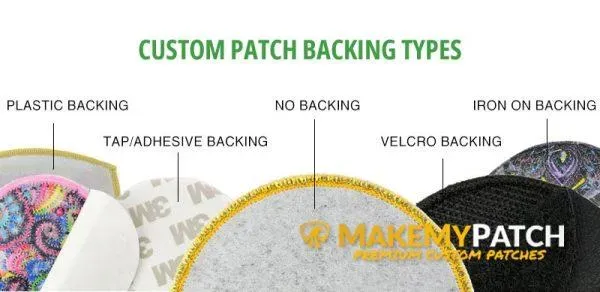
Patch backing techniques determine how patches attach to fabric, shaping durability, appearance, and wear across everything from everyday tees to rugged outerwear. To choose wisely you compare strategies and apply practical patch application tips to test adhesion on scrap fabrics, taking note of how different textures respond to heat, tension, and gentle washing, while considering fabric weight, weave, and the potential for edge curling to help you pick a method before you begin. This trio of backing options—heat-based, iron-on, and sew-on methods—defines speed, permanence, edge durability, and compatibility with a spectrum of materials, from cotton and denim to knits and leather. Heat-based approaches offer rapid bonding on sturdy fabrics but can risk damage to delicate materials or textured surfaces if heat is too high or uneven. Iron-on methods remain beginner-friendly and widely compatible, while sew-on remains the strongest option for long-lasting wear, repair projects, and items subjected to frequent washing or heavy use.
In practical terms, customers and makers often talk about attachment methods, backing choices, or adhesion strategies as interchangeable ways to describe how a patch stays put. Alternative expressions such as adhesive backing, fabric-backed patches, or sew-on fixation highlight the same idea from different angles. LSI principles suggest varying keywords like durability, washability, fabric compatibility, temporary vs permanent bonds, and edge finishing to broaden search visibility. People might refer to stick-on transfers, turnkey sewing, or merrowed edges when describing finishes, but the core concept remains securing the patch with a method suited to the garment. By recognizing these related terms, you can craft content that serves both beginners seeking quick results and professionals planning long-lasting designs.
Patch backing techniques: Choosing the right method for your custom patches
Patch backing techniques involve choosing from heat seal, iron-on, and sew-on methods, each affecting how a patch attaches, how it looks, and how long it lasts. Understanding these core options helps you pick the best backing for your project, fabric, and care routine.
By comparing heat seal, iron-on, and sew-on backing options—and how they interact with common fabrics like cotton, denim, and blends—you can map a plan for a range of custom patches backing options. This guide offers practical, descriptive insights and clear criteria to guide your choice and ensure professional results.
Heat Seal Backing: A Quick, Strong Bond for Lightweight to Mid-Weight Fabrics
Heat seal backing relies on a heat-activated adhesive either on the patch or on a separate backing sheet. When heat and pressure are applied with a press or iron, the adhesive melts and bonds the patch to fabric, delivering a fast, clean finish on lightweight to mid-weight textiles.
Pros include speed and a nearly invisible edge, while downsides include heat sensitivity of delicate fabrics and the need for proper testing on scrap fabric first. For reliable results, follow patch application tips: test temperature on a scrap piece, use parchment or a silicone sheet, and avoid steam to prevent adhesive bleed.
Iron-On Backing: Beginner-Friendly Bonding Across Fabrics
Iron-on backing embeds a heat-activated adhesive in the patch or its backing and is designed to bond with a household iron. It’s popular with hobbyists because it’s quick and straightforward across many fabrics.
Iron-on patches offer broad compatibility but can weaken with repeated washing or high heat if not properly cured. Temperature control and a protective layer are essential for a durable bond; as a best practice, start with the recommended settings and test on a hidden fabric area.
Sew-On Backing: The Most Durable Option for Heavy Wear
Sew-on backing attaches patches by stitching along the edges, delivering the most durable hold for items that endure frequent laundering or rugged use. You can sew by hand or with a machine, choosing stitches like a tight zigzag, blanket stitch, or a merrow edge for a finished look.
While extremely reliable, sew-on backing requires time and sewing skill. Visible stitching can be a design element or a potential snag point on delicate fabrics; choose needle size, thread color, and stitch type to suit the patch and fabric.
Choosing the Right Backing for Your Project
Choosing the right backing combines fabric type, patch design, intended use, and care instructions. For speed on sturdy fabrics, heat seal or iron-on backing can work after fabric testing; for maximum durability on consistent wear, sew-on backing is often best. This reflects the broader spectrum of custom patches backing options.
Practical testing helps you compare bond strength and edge durability before final production. Always follow garment care instructions, consider edge finishing like merrowed edges, and document performance for different fabrics.
Practical Roadmap: Step-by-Step Guides for Each Technique
Heat Seal Backing and Iron-On Backing share a three-phase workflow: prepare the fabric and patch, apply heat with even pressure, and verify bond after cooling. For heat seal, place the patch on clean fabric, cover with parchment, and apply per the patch’s temperature guidance. For iron-on, align the patch, add a protective layer, and press with steady pressure for the recommended time.
Sew-On Backing steps emphasize placement, securement, stitching, and finishing. Position the patch, stitch around the edge with a tight zigzag or merrow edge, then trim threads and press gently from the back. As with all methods, practice on scrap fabric first to refine tension, needle choice, and edge finishing.
Frequently Asked Questions
What are patch backing techniques and how do heat seal patch backing, iron-on patch backing, and sew-on patch backing compare?
Patch backing techniques are methods used to attach patches to fabric. Heat seal patch backing uses a heat-activated adhesive bonded with heat and pressure; iron-on patch backing provides a user-friendly version of the same idea activated by a household iron; sew-on patch backing relies on stitching for a durable attachment. Each option varies in permanence, ease of use, fabric compatibility, and care requirements. When choosing among custom patches backing options, consider your project needs and follow practical patch application tips.
How do I decide between heat seal patch backing and iron-on patch backing for my project?
Choose based on fabric tolerance to heat, desired permanence, available tools, and wash durability. Heat seal patch backing is fast on sturdy fabrics but may risk scorching delicate materials, while iron-on patch backing is beginner-friendly but can weaken with repeated washing if not properly cured. Always test on scrap fabric and follow patch application tips to confirm bond strength.
Is sew-on backing the most durable option for patches used in outdoor gear or high-wear items?
Yes, sew-on backing generally offers the strongest long-term durability across a wide range of fabrics because it relies on stitching rather than adhesive. It handles frequent washing and abrasion better, especially on jackets, bags, and outdoor gear. Use appropriate stitches (such as zigzag, blanket stitch, or merrowed edge) and apply with care for best results.
What are essential patch application tips for using different backing options?
Key patch application tips include testing on scrap fabric, preparing the fabric surface, and following recommended temperatures and times for heat seal and iron-on options. Use protective layers, ensure even pressure, allow patches to cool fully, and finish edges with suitable stitching or edging to prevent fraying. For sew-on patches, use sharp needles and adjust tension to fabric type to avoid puckering.
Which fabrics pair best with heat seal, iron-on, or sew-on backing options?
Heat seal backing works well on sturdy cottons, denim, canvas, and polyester blends; iron-on backing is versatile across many fabrics including cottons and blends, while sew-on backing is the most universal and tolerates delicate knits and heavy fabrics when stitched properly. Always test a patch on a scrap fabric to assess adhesion and edge durability before final application.
Can I combine backing options in a single project to maximize performance?
Yes. A common approach is to use heat seal or iron-on backing for initial placement and quick bond, then sew around the patch for added security and durability. This hybrid method aligns with various custom patches backing options and leverages patch design tips to ensure a strong, lasting finish.
| Backing Method | How It Works | Pros | Cons / Considerations | Best Fabrics & Tips |
|---|---|---|---|---|
| Heat Seal Backing | Heat-activated adhesive layer; patch placed on fabric, covered with parchment or silicone sheet, then heat/pressure applied per manufacturer instructions. | Fast; minimal stitching; smooth surface; good on cotton, denim, lightweight blends. | Not all fabrics tolerate high heat; potential adhesive bleed; may require release layer; durability depends on fabric and adhesive. | Ideal fabrics: sturdy cottons, canvas, denim, polyester blends. Tips: test on scrap; use clean dry iron; heat press or garment steamer; start with lower heat; avoid steam; let cool to set. |
| Iron-On Backing | Heat-activated adhesive embedded in patch; bond with iron; protective layer placed over patch; apply steady, even pressure for prescribed time. | User-friendly; quick bonding; works on many fabrics (cotton, denim, twill). | Bond can weaken with repeated washing or high heat; fabrics with nap/pile/stretch can affect adhesion; requires temperature control. | Suitable fabrics: sturdy cottons/blends, denim, canvas. Tips: follow guidelines; use protective layer; avoid steam; turn garment inside out and wash gently. |
| Sew-On Backing | Patch stitched around perimeter by hand or machine (e.g., zigzag, blanket stitch, merrow edge). | Most durable; works on almost any fabric; reversible options. | Requires sewing skill/time; longer to apply; visible stitching can be a design element or snag point on delicate fabrics. | Tips: sharp needle; thread color that blends with patch/fabric; appropriate stitch for fabric; backing stitches for corners; consider durability in hand sewing. Ideal for outdoor gear, jackets, bags; works when heat/residue is a concern. |
| Choosing the Right Backing | Guidance: For speed on sturdy fabrics, use heat seal or iron-on after scrap testing; for maximum durability or delicate fabrics, sew-on; for reversible/non-permanent, consider combining with temporary adhesive for positioning while sewing. | Flexible decision framework based on fabric, patch design, use, and care. | Requires testing; heat exposure and care instructions affect longevity. | Test patches on scrap; follow garment care; consider edge finishing (e.g., merrowed edges) to improve appearance and durability. |
Summary
Heat Seal Backing: Quick, strong bond using heat-activated adhesive. Iron-On Backing: Beginner-friendly, convenient bonding with an iron. Sew-On Backing: Most durable, best for long-term wear. Choosing the right backing depends on fabric type, patch design, use, and care. Practical steps and care tips help ensure durable results across fabrics and applications.