
DIY Patch Tricks kick off with practical, durable ideas to refresh garments without reinventing the wheel. Whether you’re renewing a denim jacket, adding flair to a backpack, or mending a favorite hat, knowing when to use sew-on vs iron-on patches can save time. This guide covers the strengths of each method, introduces clear patch application tips, and shows you how to evaluate fabric compatibility. We’ll highlight fabric patch ideas that work across materials, from heavy canvas to lightweight knits. By the end, you’ll feel confident selecting the right technique for any project and achieving a professional, long-lasting finish.
A broader view of patching methods uses alternative terms like fabric embellishments, stitched badges, and heat-activated fabric applications to describe the same practice. This comparison highlights sewn patches versus adhesive-backed designs, focusing on longevity, washability, and how the patch sits on different fabrics. Think of patching as a small-scale renovation where you decide between sewn patches and heat-bonded options to suit the fabric type and daily use. Framing the topic with related terms helps search engines recognize the topic from multiple angles while guiding readers toward practical steps. You’ll find that the core ideas align with the practical tips presented earlier.
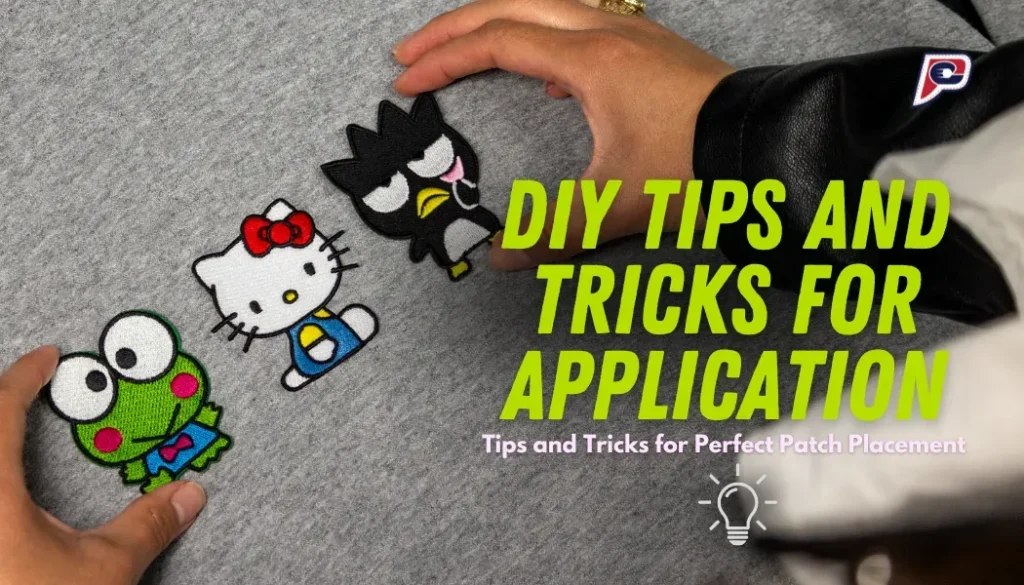
DIY Patch Tricks: When to Use Sew-On Patches vs Iron-On Patches for Projects
Choosing between sew-on patches and iron-on patches sets the baseline for durability and the finished look of your project. Understanding when to use sew-on vs iron-on patches helps you optimize for fabrics like denim, canvas, and heavy twill, where stitching delivers long-term resilience, or for lighter fabrics where heat-based adhesives can distort the fabric. This choice also influences how wash cycles and wear will impact the patch over time, so it’s worth a quick assessment using patch type, fabric, and wear patterns.
With DIY Patch Tricks in mind, you’ll map placements, test fabric response, and apply the right finishing touches—whether stitching around the edge or sealing with heat. The goal is a professional, durable result that withstands regular washing and sun exposure, so you can rely on patch application tips for both sew-on patches and iron-on patches. By the end, you’ll know which method to reach for in common projects and why it matters for longevity.
Sew-On Patches Demystified: Durability, Fabrics, and Care
Sew-on patches excel in durability, especially on heavy fabrics like denim jackets, workwear, and rugged canvas. By sewing the patch through the fabric, you create a bond that survives frequent washing and rough wear, making them a long-term solution for gear that sees real use. Choosing sew-on patches for these materials reduces risk of edge lift and adhesive failure over time.
Care considerations matter: hand stitching or machine backstitch provides a strong edge, and periodic inspection ensures corners stay secure. Patch application tips for sew-on patches include spacing from seams, choosing a tight stitch length, and reinforcing corners with multiple passes. This approach keeps the patch looking integrated rather than like a temporary addition.
Iron-On Patches for Quick Updates: Heat Bonding, Bonding, and Reinforcement
Iron-on patches offer a fast, clean look and are ideal when you want a no-stitch finish. They bond via heat-activated adhesive, which works well on cotton and denim that tolerate heat. When using iron-on patches, follow heat settings and use a pressing cloth to prevent scorching, ensuring a solid initial bond with minimal effort.
However, lifetime durability can benefit from reinforcement on frequent-use items or slippery fabrics. Patch application tips for iron-on patches include applying even pressure, avoiding sliding the iron, and letting the patch cool before testing adhesion. For longevity, consider adding a few light stitches along the edges when the item will endure heavy wear.
Patch Application Tips That Work: Planning, Testing, and Finishing
Successful patches start with planning: place the patch in the desired position, mark placement, and secure with pins or fabric chalk before any fixing. Testing on similar fabric or a scrap piece helps you gauge heat response and edge behavior, preventing misalignment and damage. These steps bridge both sew-on and iron-on methods and reduce rework.
Edge finishing is where a professional look comes from: for sew-on patches, finish with a tight backstitch or running stitch around the edge; for iron-on patches, ensure the edges are fully sealed with heat and a protective cloth. Patch application tips also include even tension to avoid puckering and considering edge reinforcement at corners for long-lasting adhesion.
Fabric Patch Ideas for Every Project: Denim, Bags, Hats, and More
Fabric patch ideas range from bold, story-telling designs on a denim jacket to subtle branding on bags or hats. Denim remains a favorite for sew-on patches because the stitch line can become part of the garment’s character. For backpacks and totes, iron-on patches deliver a quick, clean update that can be reinforced for durability.
Mix patch types for a curated vibe: a few iron-on patches for speed and a handful of sew-on patches for durability around high-wear areas. This approach aligns with patch application tips and fabric patch ideas, letting you craft a cohesive look while preserving garment integrity across different fabrics and uses.
Troubleshooting Patch Problems: Peeling, Curling, and Longevity Fixes
When patches peel at the edges or curl, reapplication is often needed, whether re-pressing iron-on patches with higher heat or adding stitches for sew-on patches. Troubleshooting common issues helps you distinguish between adhesive failure and fabric incompatibility, guiding you toward the appropriate method.
Longevity fixes include reinforcing edges with extra stitches, choosing thinner patches for flexible fabrics, and testing care labels to ensure washing doesn’t undermine adhesion. Regular maintenance—checking attachment after washes, adjusting heat settings, and avoiding harsh cycles—keeps patches looking intentional and durable over time.
Frequently Asked Questions
What are DIY Patch Tricks and how do they guide choosing sew-on versus iron-on patches?
DIY Patch Tricks is a practical guide that helps you weigh fabric type, durability, and wash frequency to decide between sew-on patches and iron-on patches. It explains the trade-offs: sewn patches offer long-term durability on heavy fabrics, while iron-on patches give a quick, clean look on fabrics that tolerate heat.
When to use sew-on patches versus iron-on patches on different fabrics?
Use sew-on patches for denim, canvas, and heavy twills where stitching provides a strong hold and wash after wash. On lighter fabrics like jerseys, iron-on patches can work well if heat won’t damage the fibers, with a backup stitch for extra security.
What are the essential patch application tips for a professional finish?
Plan placement, test on scrap fabric, and secure with pins. For sew-on patches, stitch around the edge with a tight running or backstitch; for iron-on patches, use the correct heat and cover with a pressing cloth, then confirm adhesion. Patch application tips apply to both methods.
How can I troubleshoot patches that won’t stick or lift?
Using patch application tips, if an iron-on patch won’t adhere, re-press with higher heat and longer time, or add a few stitches along the edge. If the fabric is heat-sensitive, switch to sew-on patches and reinforce edges to prevent lifting.
What are some fabric patch ideas to inspire DIY Patch Tricks projects?
Try bold sew-on patches on a denim jacket, iron-on patches for quick backpack updates, or mixed placement on jeans for a vintage look. These fabric patch ideas help you tailor patches to your style using DIY Patch Tricks principles.
What care tips does DIY Patch Tricks recommend to extend the life of patched items?
DIY Patch Tricks recommends turning patches inward when washing, using gentle cycles and low heat, and air-drying when possible. Avoid high heat after patching, and store patched items out of direct sunlight to preserve patch designs and fabric.
| Topic | Summary | Why It Matters / Example |
|---|---|---|
| Focus keyword | DIY Patch Tricks is the central focus of the post. | Uses as the main SEO anchor and aligns content with reader intent. |
| Related keywords | sew-on patches, iron-on patches, when to use sew-on vs iron-on patches, patch application tips, fabric patch ideas | Expands topic coverage and supports long-tail SEO searches. |
| Post title | DIY Patch Tricks: Sew-On vs Iron-On Patches for Projects | Defines scope and improves click-through by reflecting the content. |
| Meta description | DIY Patch Tricks: Learn when to use sew-on patches versus iron-on patches, plus patch application tips for fabrics, durability, heat settings, and care. | Helps search engines and users summarize the article; drives relevant traffic. |
| Patch types | Sew-on patches require stitching; iron-on patches use heat-activated adhesive; durability varies by fabric and method. | Key comparison for choosing method based on fabric and wear. |
| When to use sew-on vs iron-on | Guidelines by fabric type, durability/wash, aesthetics, and safety. | Helps readers decide which method fits their project. |
| Patch application tips (both) | Plan placement, test first, maintain even tension, finish edges. | Improves professional finish and reduces errors. |
| Sew-on patches: step-by-step | Prepare fabric and patch; position; stitch; reinforce corners; finish securely; optional backstitch detail. | Guides users through a durable sewing process. |
| Iron-on patches: step-by-step | Preheat iron; prepare area; bond with heat; check adhesion; optional reinforcement. | Shows quick, clean application for suitable fabrics. |
| Troubleshooting common issues | Stickiness problems, edge fray, washing-related lifting, stiffness. | Prepares readers to diagnose and fix common patch problems. |
| Creative fabric patch ideas | Denim upgrades, backpacks/totes, hats, jeans with mixed patches, lightweight jackets with strategic placement. | Inspires design-forward usage and experimentation. |
| Care and maintenance | Wash inside-out, air dry when possible, low-heat ironing, store away from direct sunlight. | Extends patch life and fabric integrity. |
| Safety, compatibility, and best practices | Check patch backing compatibility; test on delicate fabrics; favor sew-on for frequent washing. | Reduces risk of damage and ensures durable results. |
Summary
The HTML table above summarizes the key points from the base content about DIY Patch Tricks, including focus terms, patch methods, step-by-step guides, troubleshooting, care, and safety. The table helps organize the core ideas for quick reference and planning.