
Screen Printing 101 welcomes you to a practical, hands-on craft that lets you turn bold ideas into wearable art. If you’re exploring screen printing for beginners, this guide walks you through the basics, from concept to crisp, durable prints. With a compact starter toolkit and a clear workflow, you’ll build a repeatable process that minimizes mistakes. This introduction briefly touches on the essential tools, the setup, and the steps that make the process approachable for newcomers. You’ll gain confidence as you test designs, plan color separations, and learn the core design principles that lead to strong results.
From a broader perspective, this craft is about transferring vibrant imagery from a prepared stencil onto fabric, paper, or other substrates. If you’re wondering how to screen print, think of building a repeatable workflow: prepare the artwork, choose the right mesh, and manage ink with care. Key components include reliable screen printing supplies such as emulsion, screens, squeegees, inks, and a clean workspace that supports consistent results. The screen printing techniques you’ll use range from simple spot-color setups to layered ink processes and halftone effects, all of which benefit from careful registration. You’ll apply screen printing design tips such as high-contrast palettes and deliberate color separations to guide your first runs. With practice, you’ll extend your toolkit to more substrates and multi-color runs, while keeping a focus on consistency and quality. A steady practice routine, good lighting, and a clean bench are your allies as you move from theory to everyday printing. As you gain experience, you’ll notice your edges sharpen, your colors stay vibrant, and your workflow becomes quicker and more repeatable. With patience and curiosity, you can adapt the basics to signage, posters, or custom merch, widening your creative options. As you log sessions, keep notes on inks, exposure times, and test results to refine your method.
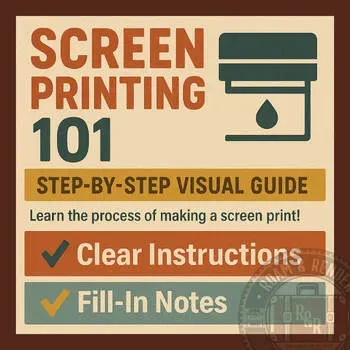
Screen Printing 101: Getting Started for Beginners
Screen Printing 101 is a practical, hands-on craft that lets you create custom apparel, posters, tote bags, and more. For beginners, the focus is on the fundamentals of screen printing for beginners, the essential screen printing supplies, and a clear path from idea to finished print. This is where you build confidence by mastering core steps, vocabulary, and a repeatable workflow that delivers consistent results across projects.
Getting started means choosing a compact starter kit and setting up a clean, ventilated workspace. You’ll learn how to screen print by following a simple sequence—from preparing the screen and emulsions to exposing the stencil and curing the ink. With the right screen printing supplies and a basic routine, you’ll see how each component contributes to clean lines, sharp edges, and durable results, even if you’re just testing ideas.
How to Screen Print Like a Pro: Core Techniques and Basic Workflows
If you’re wondering how to screen print, this section covers the essential workflow from design to a printed surface. You’ll explore the core screen printing techniques, including choosing the right mesh count, applying emulsion, burning the stencil, and using a squeegee to achieve even ink transfer. Understanding these steps helps you build a reliable process that yields consistent results across fabrics and papers.
Consistency comes from technique and practice. You’ll learn to register multiple colors, flood the screen effectively, and cure inks properly to prevent bleeding or fading. By mastering the basic workflow—prepping the screen, exposing the design, printing with steady pressure, and curing—you’ll elevate your projects while keeping the process approachable for screen printing beginners.
Building Your Screen Printing Supplies Kit: A Practical Starter Guide
A practical starter guide centers on assembling essential screen printing supplies. Start with durable screens, a reliable emulsion system, a scoop coater, a basic set of squeegees, and suitable inks for your chosen substrates. This focus on screen printing supplies ensures you have the right tools to learn the process without overwhelm, while keeping room to expand your kit as you grow.
As you gain experience, you can gradually add items like a press or jig for alignment, a dedicated drying area, and specialty inks or additives. The goal is to cultivate a workflow that’s repeatable and scalable, so you can tackle more complex designs and color layers. A thoughtful starter kit keeps learning approachable and helps you practice screen printing design tips and techniques in real-world projects.
Design Essentials for Screen Printing: Tips and Tricks
Effective screen printing design starts with bold shapes, clean lines, and color planning. Emphasize screen printing design tips such as limiting color counts, using high-contrast palettes, and planning separations early. Vector artwork is preferred for scalable, crisp results, while raster formats should be prepared at high resolution with careful color separation to ensure smooth inks across layers.
Prepare templates and test prints to verify alignment and ink behavior before committing to screens. Concentrate on simple, impactful designs that translate well to fabric or paper, then advance to multi-color runs as you gain confidence. These design strategies help you achieve strong results and reduce misregistration, making screen printing more approachable for beginners while leveraging core design principles.
Techniques for Beginners: Spotlight Colors, Halftones, and Process Color
Exploring screen printing techniques expands what you can create. Start with spot colors to keep a clean, bold look, then experiment with halftones or texture additives to introduce shading without complicating color separation. As you grow more confident, you can explore simulated process color to mimic multi-color photos using multiple screens and careful registration.
Practicing these techniques reinforces the need for careful color management and thoughtful ink layering. Plan color sequences, manage ink consistency, and test whether your chosen substrates respond well to each ink type. By gradually incorporating more advanced techniques while keeping the project scope manageable, you’ll strengthen your screen printing skills and produce more professional results.
Maintenance, Troubleshooting, and Best Practices in Screen Printing
Maintaining equipment and keeping a clean workflow are essential for long-term success. Regularly clean screens, reclaim screens when designs change, and store inks properly to preserve their performance. Establish a well-ventilated space and keep a tidy work surface to reduce accidents and maintain consistent results across sessions.
Troubleshooting common issues—such as misregistration, ink bleed, or inconsistent curing—relies on a systematic approach: check tension and alignment, review exposure times, and verify ink compatibility with the substrate. Document your process, iterate on test runs, and refine your setup so you can quickly identify and fix issues, ensuring reliable, high-quality prints every time.
Frequently Asked Questions
What is Screen Printing 101 and why should beginners start here?
Screen Printing 101 is the foundational guide for beginners, introducing core vocabulary, a clear workflow, and essential safety practices. Starting with Screen Printing 101 helps you build confidence as you learn about screen printing for beginners and the essential screen printing supplies. This guide covers the basic steps and fundamental techniques you’ll rely on to print with consistency.
What are the essential screen printing supplies for Screen Printing 101 beginners?
Core supplies for Screen Printing 101 include screens, emulsion and remover, a scoop coater, squeegees, textile inks or general inks, a heat source for curing, tape, a scraper, lint remover, and a basic press or jig. Begin with a compact beginner’s kit and expand as you gain experience to build solid screen printing supplies knowledge.
How should I prepare artwork for Screen Printing 101: design tips for beginners?
Start with a simple design featuring bold shapes and clean lines. For Screen Printing design tips, separate colors into layers, prefer vector artwork for scalability, and limit color counts to 2–4 to simplify registration. Always test your artwork with mockups to ensure clean separations before printing.
What are the basic steps of the screen printing process taught in Screen Printing 101?
The basic process for Screen Printing 101 includes coating the screen with emulsion, drying, burning the stencil into the emulsion, rinsing to expose the design, setting up the substrate, flooding and pulling ink with a squeegee, and finally curing the print. These steps establish a repeatable workflow that helps beginners learn how to screen print with accuracy.
Which screen printing techniques should beginners explore after completing Screen Printing 101?
After mastering Screen Printing 101, you can explore techniques such as spot colors for crisp edges, halftones and texture for shading, simulated process color for multi-color images, and discharge or pigment blends for different fabric hand feels. These screen printing techniques expand your capabilities while building on your foundational skills.
What common problems occur in Screen Printing 101 projects and how can I troubleshoot them?
Common issues include misregistration, ink bleeding, incomplete curing, and stencil breakdown. Troubleshoot by checking registration marks and alignment, testing inks on similar substrates, increasing cure time or temperature as needed, reclaiming and re-exposing screens, and ensuring proper ventilation and cleaning with appropriate screen printing supplies.
| Aspect | Key Points | Notes / Tips |
|---|---|---|
| What is Screen Printing 101? |
|
Start with bold, simple designs for best results. |
| Getting started: Tools, supplies, and setup |
|
Plan a gradual build: start with essentials, add tools as you gain experience. |
| Design preparation |
|
Practice color separation and testing before production. |
| Printing basics: the process step by step |
|
Follow a consistent workflow for repeatable results. |
| Techniques that expand your capabilities |
|
Increase complexity gradually; maintain registration accuracy. |
| Maintenance, troubleshooting, and best practices |
|
Regular checks extend equipment life. |
| Creating prints on various surfaces |
|
Match ink to substrate and plan color order simply. |
| Design tips for successful screen printing projects |
|
Use testing to refine your workflow. |
| Scaling your skills and ideas |
|
Each session builds registration, ink application, and curing muscle. |
Summary
HTML table summarizing key points about Screen Printing 101.