
DIY screen printing on apparel blends creativity with hands-on technique, inviting you to transform plain garments into personal statements. If you’re new to this craft, you’ll learn essential skills in screen printing for beginners and practical steps to start making your first prints. This beginner-friendly guide covers design planning, ink choices, and the basic setup you’ll need to start making crisp, durable prints. From pre-wash and alignment to pressing and curing, you’ll follow a practical workflow that keeps the process approachable. With a simple starter toolkit and steady practice, you can turn ideas into wearable art and build confidence in your printing journey.
Beyond the basics, the idea translates into textile printing and is often called silkscreening on fabric, using mesh screens to transfer designs onto garments. From this LSI-friendly angle, you can think in terms of screen-printed apparel, stencil printing on textiles, and other beginner-friendly approaches to garment decoration. The workflow stays similar: design, prepare a stencil, apply ink, and cure or set the finish, while the emphasis is on learning the fundamentals. As you grow, you can experiment with different fabrics, colors, and layouts to broaden your range and keep your projects engaging.
DIY screen printing on apparel: A Beginner’s Guide
If you’re new to screen printing for beginners, this DIY screen printing on apparel guide walks you through a simple, repeatable process you can grow with. Start with a minimal setup: a couple of screens, ink, a squeegee, and a flat platen. This keeps things approachable while you learn the foundational steps that underlie all wearable art.
Starting with DIY screen printing on apparel helps you master the basics before tackling more complex designs. You’ll gain hands-on familiarity with the workflow—from design planning to curing—and you’ll learn how to screen print t-shirts at home, decide between water-based inks and plastisol, and troubleshoot common hiccups without getting overwhelmed.
Choosing the Right Screen Printing Supplies for Beginners
A solid starter kit for screen printing supplies includes pre-stretched screens with a suitable mesh count, a sturdy frame, emulsion and sensitizer, a print surface or platen, a squeegee, and basic cleaning tools. If you’re on a budget, look for beginner bundles that bundle screens, inks, and a squeegee to get you printing quickly.
Understanding ink types matters: water-based inks are more forgiving for beginners and clean up with soap and water, while plastisol inks require heat curing and may demand a heat source. Matching your inks to your screens, block-out tape, and exposure method will save you time and frustration as you build your screen printing supplies arsenal.
Design to Print: How to Screen Print T-Shirts at Home
If you’re wondering how to screen print t-shirts, start with a simple, high-contrast design and plan it for a single-color pass. Prepare your artwork, set up your emulsion-coated screen or stencil, and align the garment on the platen. This is the core of the process that turns your design into a tangible wearable.
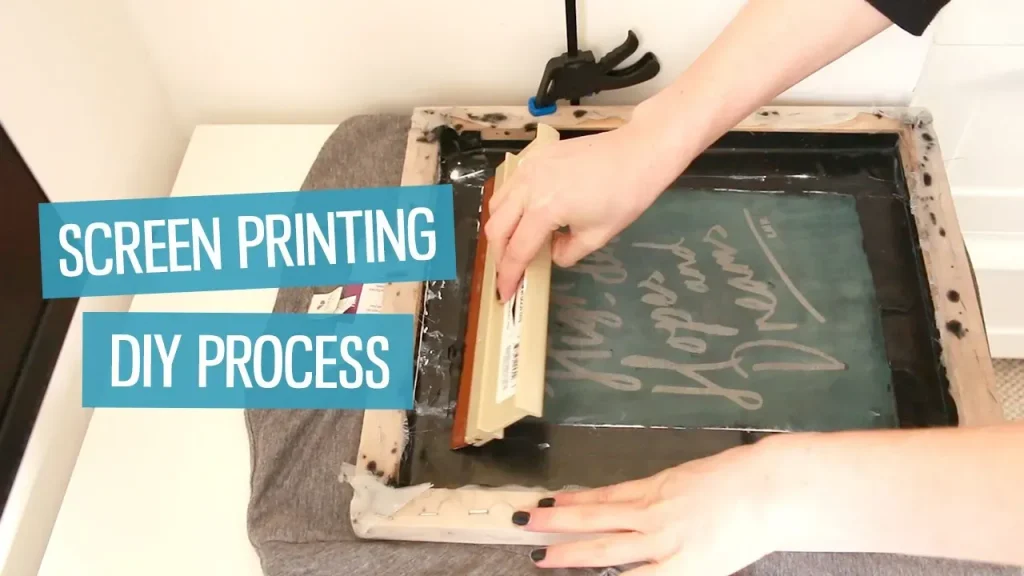
From there, you’ll mount the screen, apply a small amount of ink, and use a smooth, even squeegee stroke to transfer the image. For DIY tshirt printing, keep the design straightforward at first, then experiment with color overlays and multi-color layering as you gain confidence.
Silkscreen Printing on Fabric: Techniques and Troubleshooting
Silkscreen printing on fabric requires attention to fabric type, ink choice, and proper fixation of the stencil. Start with cotton or a similar fiber and ensure the garment is clean and dry. A well-prepared screen and clean printing surface help prevent ink bleed and ensure crisp edges when doing silkscreen printing on fabric.
Common issues include uneven ink transfer and pinholes. Troubleshooting steps include verifying mesh tension, adjusting squeegee pressure, and ensuring proper emulsion exposure or stencil adhesion. As you practice, you’ll learn how to troubleshoot during silkscreen printing on fabric without wasting materials.
DIY Tshirt Printing: Inks, Techniques, and Best Practices
In the realm of DIY tshirt printing, choosing the right ink is crucial. Water-based inks are more forgiving on fabric and easy to clean, while plastisol inks require heat curing and may feel thicker on the garment. Consider your equipment, your curing method, and the expected wear when deciding on ink choices for DIY tshirt printing projects.
Experiment with simple one-color designs first, then explore layering, gradient effects, and metallic or glow-in-the-dark finishes as your confidence grows. Keeping a log of successful combinations (mesh count, ink type, squeegee angle, and curing time) helps you scale your projects and improve consistency in DIY tshirt printing.
Curing, Finishing, and Maintenance for Long-Lasting Prints
Once a print is laid down, curing is the next critical step. Temperature and time vary by ink type, but plastisol inks typically cure around 320-325°F (160-165°C) for several minutes. If you don’t have a heat press, a household iron can work for practice, but you may not reach the same durability for shop-grade results.
Maintenance of printing gear and supplies is essential for longevity. Clean screens, squeegees, and tools promptly to prevent ink build-up, store screens to prevent warping, and inspect prints for defects. Regularly validating your process and keeping good screen printing supplies on hand will help you reproduce crisp, durable results.
Frequently Asked Questions
What is DIY screen printing on apparel and what should a beginner know to start?
DIY screen printing on apparel is a hands-on method to create custom prints on clothing using screens, ink, and a squeegee. For beginners, start with a simple one-color design, choose beginner-friendly inks (water-based), and learn the core workflow: design selection, screen preparation (emulsion or stencil), garment prep, printing, curing, and cleanup.
How to screen print t-shirts at home for DIY screen printing on apparel?
To print t-shirts at home for DIY screen printing on apparel, start with a basic design, prepare your screen (emulsion-based or stencil), and secure the garment on a platen. Use a smooth, even squeegee stroke and apply ink only to the top edge of the image, then pull across in one confident pass. For DIY screen printing on apparel, keep it simple at first and follow the ink’s curing guidance to ensure durability.
What are the essential screen printing supplies for DIY tshirt printing?
Key screen printing supplies include pre-stretched screens, a squeegee, ink (water-based recommended for beginners), a platen, emulsion and sensitizer if making your own stencil, test garments, tape, and cleaning supplies. Add a heat source for curing and simple tools for cleanup to support DIY tshirt printing.
What’s the difference between water-based and plastisol inks in DIY screen printing on apparel?
Water-based inks are typically easier for beginners, offering a soft feel and easier cleanup, while plastisol inks provide stronger opacity and durability but require heat curing and more controlled conditions. Choose based on your project, available equipment, and your comfort with curing in DIY screen printing on apparel.
What are common issues in silkscreen printing on fabric and how can beginners fix them?
Common issues include incomplete ink transfer, bleeding, and pinholes. For silkscreen printing on fabric, ensure your screen is clean, your stencil is properly aligned, and ink viscosity is appropriate. Practice on scraps, adjust squeegee pressure, and verify curing times to improve results.
How should I set up a beginner-friendly workspace for DIY screen printing on apparel?
Create a clean, well-lit area with a sturdy table and good ventilation. Keep your screen printing supplies—screens, squeegees, inks, emulsion, and cleaners—organized and within reach, and start with a simple one-color project to build confidence.
| Topic | Key Points |
|---|---|
| Introduction | DIY screen printing on apparel is a rewarding craft blending creativity with hands-on technique. A beginner-friendly, step-by-step guide helps you customize garments (t-shirts, hoodies, tote bags) and covers core concepts, needed materials, and actionable steps for crisp, durable prints. |
| What you’ll gain | Practical, repeatable workflow; essential gear; design prep; screen setup; printing; curing; cleanup; plus guidance to avoid common beginner pitfalls. |
| Design planning & materials | Plan your project: design, inks, and approach (emulsion vs stencil). Start with a simple one-color design to learn mechanics. High-contrast, sized/design density considerations; ready-made screens or vinyl options can reduce complexity; basic emulsion concepts. |
| Essential tools & supplies | Screens and frames; emulsion and sensitizer; print surface/platen; squeegee; inks (water-based for beginners; plastisol requires different curing); test garments; tape, scraper blades, brushes, cleaners; a light-safe workspace. |
| Step-by-step workflow (artwork to print) | Part 1 — Design prep & screen setup: choose a simple design; coat screen with emulsion or prepare stencil. Part 2 — Garment prep & screen mounting: pre-wash garments; secure; align. Part 3 — Printing process: apply ink, squeegee, check; repeat if needed. Part 4 — Drying & curing: drying times; recommended temperatures; iron as practice. Part 5 — Cleanup & maintenance: clean tools; store screens; inspect prints. |
| Drying, curing & finishing | Drying times vary by ink; water-based inks air-dry (may require curing); plastisol inks require heat curing (typical guidance around 320–325°F / 160–165°C for 2–3 minutes, follow ink guidelines). A domestic iron can be used for practice but durability may be limited. |
| Cleanup & maintenance | Promptly clean screens, squeegees, and tools; water-based inks clean with soap and water; plastisol may need solvents. Store screens to prevent warping and keep mesh tight. Inspect prints for issues to improve next time. |
| Practical tips | Maintain a clean workspace; use bold, high-contrast designs; practice controlled squeegee pressure; test on scraps; keep a log of effective settings (mesh count, ink, squeegee angle, speed, curing time) for repeatable results. |
| Common challenges & fixes | Incomplete ink transfer: check viscosity and screen cleanliness. Smudging during curing: ensure garments are dry and cure at correct temp/time. Bleed/halo: mask edges, tighter stencil, or slightly reduce opacity. |
| Design ideas to grow your project | Experiment with multi-color prints, gradients, and layered textures. Consider metallics or glow inks; expand to tote bags and hoodies; explore typography, logos, and silhouettes to express your style. |
| Inspiration | Connect with local makerspaces or online communities to share tips, troubleshoot, and showcase designs. Silkscreen printing on fabric is a vast field that rewards practice and portfolio-building. |
Summary
DIY screen printing on apparel is an accessible and enjoyable way to express creativity while learning a tangible craft. By starting with a simple setup and gradually expanding your toolkit, you’ll build reliable, repeatable results and gain confidence to tackle more complex designs. This guide emphasizes practical workflow, quality prints, and mindful troubleshooting to help beginners avoid common mistakes. As you practice, you’ll develop a personal style and a growing portfolio of wearable art that reflects your evolving skills.