
UV DTF transfer opens a new frontier in garment decoration, delivering bold, durable designs with the precision of UV-curable inks. This approach blends modern printing accuracy with a versatile transfer process, making it ideal for cotton, blends, and performance fabrics. By leveraging UV DTF printing alongside a reliable transfer film, designers can achieve vivid colors, sharp edges, and wash-fast results. To get consistent outcomes, understanding the right materials, printer settings, and heat-press parameters is essential. In this guide, you will discover practical tips and related terms such as DTF transfer materials, DTF ink settings, heat-press tips, and heat press settings for DTF to optimize your workflow.
A UV-curable DTF-on-film workflow merges digital printing with a transfer phase to decorate fabrics with intricate detail. Designs are rendered on a transfer substrate using UV inks and then applied with heat to cotton, blends, or performance textiles. This approach leverages a film-based transfer to reproduce color-rich artwork while preserving a soft hand and breathable feel. For success, select compatible transfer materials, calibrate ink behavior, and tailor heat press settings for DTF to your fabric type.
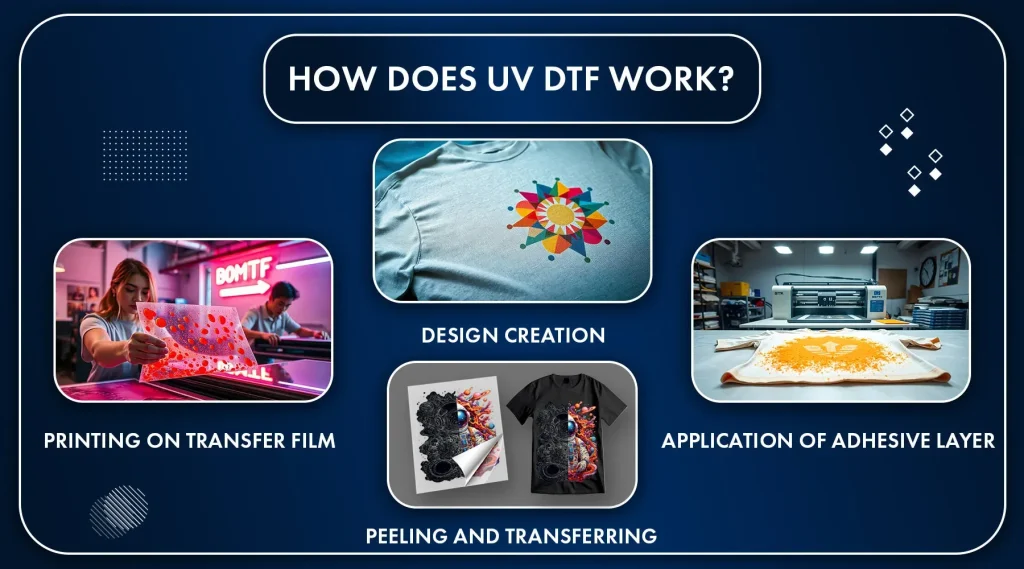
1) UV DTF Transfer Workflow: From Design to Garment
UV DTF transfer blends the precision of UV DTF printing with a transfer process to apply vibrant designs to cotton, blends, and performance fabrics. By printing on a transfer film with UV-curable inks and then heat-pressing the film onto fabric, you can achieve sharp edges, broad color gamut, and a soft hand feel that’s suitable for durable wear. This workflow emphasizes careful material pairing, accurate alignment, and controlled curing to ensure consistent results across batches.
In practice, start with a clean design file, select a transfer film compatible with UV inks, and test on representative swatches. Proper pre-press and post-press steps, along with attention to DTF ink settings, help minimize color shifts and edge halos. When you combine UV DTF printing with a reliable transfer system, you gain repeatable color fidelity and easier production management for multiple fabric types.
2) Selecting DTF Transfer Materials for Color Fidelity and Durability
Choosing the right DTF transfer materials is foundational for color accuracy and wash durability. Focus on a transfer film and adhesive system that hold sharp detail during transfer and remain secure through repeated laundering. The adhesive layer must activate reliably with your chosen heat-press conditions, ensuring pigment adhesion to the fabric without excessive cracking.
Fabric substrates—cotton, cotton-poly blends, and polyester blends—respond differently to heat and ink chemistry. Test on swatches to gauge substrate behavior and adjust heat settings accordingly. Managing ink behavior and color with ICC profiles tailored to the film and fabric helps maintain consistent results across runs and reduces post-process color corrections.
3) Optimizing UV DTF Printing Settings for Sharp Detail
For most designs, aim for 300–600 dpi resolution to balance detail and file size, with higher dpi reserved for complex photography. Robust color management, including ICC profiles matched to your transfer media and UV inks, reduces the need for heavy on-press color corrections and yields more predictable results across batches.
DTF ink settings matter: adjust ink laydown, density, and the number of passes to achieve bold color without bleeding or edge halos. Ensure the printed film is cured properly—either during the print process or as a post-cure step—so the film remains stable during handling and transfer. Accurate alignment marks and calibration help maintain consistent results from sheet to sheet.
4) Heat-Press Tips and Settings for DTF Transfers
Heat-press tips are essential for reliable transfer results. Pre-press the garment briefly to flatten fibers and remove moisture, then apply even, consistent pressure at the recommended temperature. Typical starting points for DTF-based transfers range around 160–170°C (320–338°F) for 10–20 seconds, but adjust based on fabric type and adhesive chemistry.
In practice, use a clean platen and verify the adhesive activation during the press. Post-press handling varies by film—some require hot-peel while others benefit from a warm or cold peel—so follow the transfer film’s guidance. Documenting these settings helps you maintain standardized heat-press settings for DTF across different fabrics and batch sizes.
5) Curing, Finishing, and Wash Durability for UV DTF
Curing and finishing are core to wash-durable UV DTF transfers. Some workflows cure the design with UV exposure before the heat press, while others rely on the heat-press pass to complete the setting. Choose the approach that aligns with your equipment and film to optimize color retention and edge stability.
A properly cured print resists cracking and color fading through multiple wash cycles. Finishing steps, such as light post-treatments or coatings recommended by the manufacturer, can further improve color vibrancy and hand feel. Adhere to washing guidelines to preserve the transfer’s appearance, especially during the first few laundering cycles.
6) Troubleshooting and Quality Control for UV DTF Transfers
Even with a careful setup, issues can arise. Common problems include color shifts, edge bleeding, misalignment, or ghosting. Revisit ICC profiles, ink density, and drying/curing steps, and verify that the transfer film and substrate are compatible with your UV inks.
Quality control and maintenance are ongoing processes. Regularly inspect transfer films for thickness consistency, clean printer heads and shields, and keep a documented log of test results for each fabric and film combination. A structured approach to troubleshooting will help you scale production with fewer unexpected defects.
Frequently Asked Questions
What is UV DTF transfer and how does it relate to UV DTF printing?
UV DTF transfer is a Direct-to-Film workflow that uses UV-curable inks printed on a transfer film and then applied to fabric with heat. It combines the precision and color range of UV DTF printing with the convenience of a transfer process, delivering sharp detail, a soft hand feel, and strong wash durability when materials and heat-press steps are well controlled. For consistent results, manage the transfer film, adhesive, and UV inks carefully and follow recommended curing and pressing parameters.
Which DTF transfer materials are best for UV DTF transfer?
Choose DTF transfer materials designed for UV workflows, starting with a transfer film and adhesive that pair well with UV-curable inks. Test on representative fabrics (cotton, blends, performance fabrics) to verify adhesion, edge stability, and hand feel. Ensure your chosen materials support color fidelity and clean peel after transfer.
What are the key DTF ink settings for UV DTF printing?
Key DTF ink settings for UV DTF printing include using UV-curable inks with proper ICC color management, printing at 300–600 dpi for clean detail, and balancing ink density and passes to avoid bleeding. Calibrate color output to match your transfer film and fabric, and cure the printed film adequately before transfer.
What heat-press tips and heat press settings for DTF should I use with UV DTF transfer?
Follow heat-press tips and settings for DTF when working with UV DTF transfer: pre-press the garment to remove moisture, set temperature around 160–170°C (320–338°F), dwell 10–20 seconds, and apply even pressure. Use a flat, clean platen and peel per film guidelines (hot or warm) after pressing. Adjust dwell time or temperature for different fabrics and adhesive chemistries as needed.
How should I cure and finish UV DTF transfer to improve durability?
Cure and finish UV DTF transfers to maximize durability: some workflows require an initial UV cure before transfer, others rely on the final heat-press pass. Ensure complete cure of UV inks and proper adhesion through the transfer film and adhesive layer, then follow washing recommendations to preserve color and hand feel.
What are common issues with UV DTF transfer and how can I troubleshoot them?
Common issues with UV DTF transfer include color shifts, edge halos, bleeding, peeling, or ghosting. Use calibrated ICC profiles and accurate ink density settings, verify film-substrate compatibility, and perform test prints before production. Check alignment using calibration targets and ensure proper pre-press, curing, and heat-press timings to reduce defects.
| Topic | Summary | Practical Tips |
|---|---|---|
| What is UV DTF transfer? | Direct-to-Film workflow using UV-curable inks to print designs on transfer film, which is then applied to fabrics with a heat press. It delivers a soft hand, broad color gamut, high detail, and consistent results across batches when materials and settings are properly managed. | – Use UV-curable inks designed for textiles and a transfer film compatible with UV inks. – Use an adhesive layer suitable for your fabric and film. – Test on representative swatches to assess behavior on different fabrics. – Follow manufacturer guidelines for curing and transfer settings. |
| Materials for UV DTF transfer | Key materials include transfer film with adhesive, appropriate fabric substrates (cotton, cotton blends, polyester blends), UV inks, color management (ICC profiles), optional pre-/post-treatments, and finishing aids. | – Choose a DTF transfer film designed for UV inks and with sharp detail. – Test films with your fabric swatches. – Calibrate colors with ICC profiles for printer, ink, and media. – Consider pre- or post-treatments to improve wash durability or vibrancy. – Check compatibility if using powders or finishing aids. |
| Printer settings and ink considerations | Use UV-curable inks and ensure proper curing. Typical resolution is 300–600 dpi for clean detail. Calibrate color output with ICC profiles. Adjust ink density and passes to balance saturation with drying time. Ensure inks cure fully to prevent color migration and misalignment. | – Calibrate with ICC profiles for film, substrate, and inks. – Run test prints to avoid banding and color shifts. – Optimize ink laydown and number of passes for sharp edges and minimal bleed. – Ensure adequate drying/curing before handling the transfer. – Use precision alignment marks for consistent placement. |
| Transfer settings and workflow | After printing, transfer the design to fabric with careful control of pre-press, temperature, time, and pressure. Common starting points are around 160–170°C (320–338°F) for 10–20 seconds, with even pressure. Post-press handling and considerations for multi-layer designs are important. | – Pre-press to flatten fabric and remove moisture. – Start with 160–170°C (320–338°F) for 10–20 seconds; adjust by fabric and film. – Apply even pressure; keep platen clean. – Follow film/adhesive guidance for peel (hot, warm, or cold). – For multi-layer designs, ensure proper activation of adhesive and alignment. |
| Curing, finishing, and durability | Curing contributes to color fidelity and wash durability. Some workflows cure before transfer; others cure during or after the heat-press step. Proper curing and pressing yield color retention and a soft hand feel. | – Follow manufacturer curing guidelines and match to your workflow. – Ensure complete cure to resist fading and cracking. – Avoid over-drying or overheating to preserve hand feel. – Follow wash guidance to maximize durability. |
| Troubleshooting common issues | Common problems include color shift/banding, edge bleeding, peeling after washing, ghosting, and edge curling. | – Revisit ICC profiles, ink density, and drying/curing steps when color shifts occur. – Tweak ink density and reduce oversaturation at edges to prevent bleeding. – Re-validate curing and peel type if peeling or cracking appears. – Calibrate printer/transfer jig to fix misalignment; use test sheets. – Pre-press or adjust heat/pressure to reduce curling. |
| Quality control and maintenance | Regular checks of transfer films, equipment maintenance, and keeping process documentation help sustain consistent results. | – Inspect film material for consistency in color and thickness. – Clean printer heads and heat-press components per vendor guidelines. – Maintain a log of tested settings for fabrics/films to scale production with confidence. – Document results to drive continuous improvement. |
Summary
Table presents key points on UV DTF transfer covering definitions, materials, printer settings, transfer workflow, curing and durability, troubleshooting, and maintenance.