
Screen printing is a versatile, hands-on craft that blends art and engineering. Whether you’re creating limited-run apparel, posters, or custom packaging, understanding the fundamentals of screen printing unlocks endless creative possibilities. This guide introduces the essentials—from the right tools to proven techniques—and it demystifies troubleshooting so you can consistently produce sharp, vibrant prints. If you’re new to this craft or looking to elevate a small studio, you’ll find practical, actionable steps that apply to both beginners and seasoned practitioners. Expect a balanced mix of theory, real-world tips, and actionable workflows that help you master the craft with confidence.
Beyond the common label, this craft is a form of stencil-based printmaking that translates artwork into layered ink on fabric and paper. Many practitioners refer to it as silkscreen printing, a broader tradition that emphasizes tactile textures and bold, graphic results, while still hinging on core screen printing techniques. As you grow, you’ll explore screen printing tools and materials—frames, emulsions, squeegees, inks—tailored to textiles or paper. When things go awry, a systematic approach to screen printing troubleshooting helps you diagnose issues quickly, a key skill for DIY screen printing projects. Overall, the same principles apply, whether you call it screen printing or silkscreen printing, with the aim of consistent ink transfer, sharp edges, and durable finishes.
Building a Solid Screen Printing Tools and Setup
Starting with the right tools sets the foundation for reliable screen printing. Your screen printing tools, from frame and mesh to emulsion, exposure unit, and squeegees, determine how sharply ink is laid and how clean the edges will be. A deliberate tool selection helps you reproduce detailed artwork, maintain consistent color, and reduce setup waste in small runs or DIY screen printing projects.
A clean, well-lit, vented workspace supports repeatable results and safer handling of solvents and inks. Regular maintenance of frames, screens, and reclaiming solvents keeps equipment in top condition, so you can focus on design, registration, and color layering. In short, investing in a solid setup pays off in faster cycles and higher-quality prints, whether you’re printing on cotton tees or posters as part of DIY screen printing.
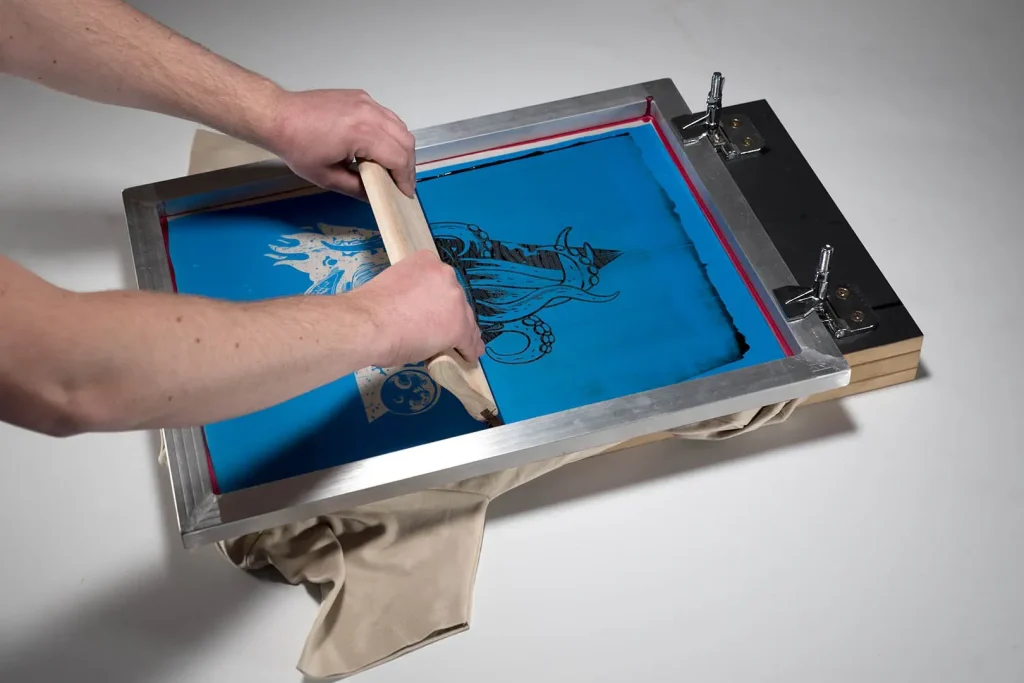
Mastering Screen Printing Techniques for DIY Projects
Art preparation and prepress are foundational in screen printing techniques. Start with high-contrast designs and clean film positives to ensure crisp edges when you transfer the stencil. Understanding how screen printing techniques separate colors, manage line work, and control halftones informs every subsequent step in DIY screen printing projects.
With DIY screen printing, you’ll benefit from practicing on paper or fabric first and keeping color separations simple. This practical approach helps you perfect registration, alignment, and the timing of ink deposition, all while learning how different substrates respond to each color layer.
Screen Printing Troubleshooting: Fixes for Common Issues
Screen printing troubleshooting often begins with a simple diagnosis: are edges blurred, is ink not transferring, or do you see pinholes? This section guides you through a methodical check of exposure, screen tension, squeegee angle, and ink open time, all critical to recovering sharpness.
By building a run sheet of test prints, you can isolate variables—whether it’s the exposure unit, the stencil integrity, or humidity affecting ink viscosity. A disciplined approach to troubleshooting saves material, reduces waste, and keeps your DIY screen printing workflow moving forward.
Choosing Inks and Substrates for Silkscreen Printing Success
Choosing inks and substrates is a cornerstone of successful silkscreen printing. The choice between water-based and plastisol inks changes hand-feel, cure requirements, and wash durability, while substrate compatibility guides color brightness and adhesion. In silkscreen printing, testing on a sample swatch is essential before committing to a full run.
Consider the substrate’s texture, fiber content, and finish when selecting inks. Silkscreen printing benefits from adjusting viscosity with additives, matching ink to fabric, paper, or plastics, and planning an appropriate cure profile for consistent, durable results.
Color Separation and Registration for Multi-Color Screen Printing
Color separation and registration are the heart of multi-color screen printing. Planning color layers as solid fills and minimal overlaps reduces misregistration and ghosting, while using precise film positives and a reliable registration system helps you reproduce complex artwork with predictable results in screen printing techniques.
Test prints on the chosen substrate reveal whether your layers align, whether there’s bleed between colors, and whether underbases are required for true color reproduction. This iterative step keeps your project on track and strengthens your overall process for future runs in screen printing.
From Paper to Fabric: Silkscreen Printing on Different Surfaces
From paper to fabric, silkscreen printing expands into posters, packaging, and garments with a careful workflow. Start with proper stencil creation and ink selection, then monitor curing times and surface interaction to achieve consistent results across materials.
Maintenance and longevity come from regular reclamation, screen cleaning, and calibration of exposure equipment. Documenting settings and outcomes builds a repeatable practical loop for DIY screen printing or small shops, extending the life of tools and improving color stability over time.
Frequently Asked Questions
What are the essential screen printing tools you need to start screen printing?
Start with the basics: a frame or screen, mesh, emulsion and remover, a light-safe workspace, a reliable exposure unit, squeegees and flood bars, a selection of inks (plastisol or water-based), and a drying or curing setup. These screen printing tools lay the foundation for consistent results in both DIY screen printing projects and small studio runs. Keep your workspace clean, ventilated, and safe when handling solvents.
Which screen printing techniques most affect edge sharpness and color registration?
In screen printing techniques, design preparation, film positives, and precise color separations influence edge sharpness. Coating the screen evenly, controlling exposure, and using a reliable registration system help achieve crisp lines and accurate color alignment. Run a few test prints to dial in exposure and registration before production.
What are common screen printing troubleshooting steps for blurry edges, ink gaps, and misprints?
Screen printing troubleshooting starts with verifying exposure accuracy and ensuring the screen stays still during printing to prevent blurring. For ink gaps, check ink viscosity, screen tension, and flood stroke consistency. Pinholes or incomplete transfer often come from stencil issues or undercure, so recoat or adjust cure time and inspect the substrate prep.
Is DIY screen printing a viable option for small runs on a budget?
Absolutely. DIY screen printing can yield professional results with a focused setup: start with a simple two-color design, reuse a sturdy frame and screen, and choose inks suited to your substrate. Maintain screens, document curing times and recipes, and upgrade equipment gradually as demand grows.
What is silkscreen printing and how does it relate to screen printing in practice?
Silkscreen printing is the broader term for the same core process as screen printing and is often used in art prints and posters. The practical workflow—design, coating, exposure, and stencil printing—remains the same, with silkscreen printing sometimes emphasizing hand-cut stencils and texture. Both share the same tools, techniques, and troubleshooting discipline.
How should I cure and finish screen printing projects to ensure durability?
Curing and finishing depend on ink type: water-based inks require careful drying to preserve softness, while plastisol inks demand proper heat curing. Follow the ink’s temperature and time specifications using a heat source, conveyor dryer, or heat press, and test-cure a sample to confirm full cure for wash-fast results.
| Section | Key Points |
|---|---|
| Introduction | Screen printing blends art and engineering; versatile for apparel, posters, and packaging; fundamentals unlock creativity; covers tools, techniques, and troubleshooting; suitable for beginners to seasoned practitioners; practical steps and workflows included. |
| Tools and Materials | Core toolkit: frame/screen, emulsion and remover, light-safe workspace, exposure unit, squeegees, and suitable inks; workspace safety and cleanliness; mesh count affects detail; coatings, exposure/separation, alignment, and registration; ink types (plastisol, water-based, discharge) and additives; drying/curing; cleaning and reclaiming. |
| Techniques and Workflows | Practical workflow: design/film prep, screen coating and drying, exposure, washing, curing; color alignment/registration; inking and squeegeeing with consistent strokes; curing per ink specs; substrate/ink compatibility (cotton vs synthetics; water-based vs plastisol). |
| Substrates and Ink Compatibility | Cotton vs synthetics; paper interaction with inks; water-based inks yield softer hand-feel but need careful curing; plastisol inks offer vibrant color and durability but can feel stiffer; underbases may be needed for light-on-dark designs. |
| Troubleshooting | Common issues: blurred/ghosted edges; inconsistent ink coverage; pinholes; ink not transferring; cracking/peeling; staining; remedies include adjusting exposure, stabilizing press, checking squeegee, ink viscosity, curing, and cleaning between runs. |
| DIY Screen Printing Tips | Begin with a simple two-color design and a durable substrate (100% cotton); reuse/reclaim frames and basic exposure setups; choose inks by substrate; practice color separation on paper; maintain equipment; document recipes, curing times, and temperatures. |
| Advanced Techniques and Variations | Halftones, gradient fades, and specialty inks (glitter, metallics, discharge); multi-color requires multiple screens and precise spacing; textiles may use texture with layered stencils; silkscreen on paper/posters benefits from high-contrast inks. |
| Maintenance, Reclaiming, Longevity | Regularly wash and inspect screens; reclaim finished designs; post-run cleaning routines; emulsion stripping when needed; calibrate exposure unit for consistent results. |
| Silkscreen / Broader View | Silkscreen is the broader term used alongside screen printing; often emphasizes art prints and limited-edition works; same core tools and troubleshooting; can involve textured surfaces and hand-cut stencils. |
| Conclusion | Mastery in Screen printing comes from practice, consistent workflows, and quality control. Start with the right tools and techniques to understand ink behavior and stencil fidelity, then develop a robust troubleshooting mindset. With deliberate practice, you’ll see gradual improvements in color accuracy, edge definition, and texture, whether you’re printing DIY projects or running a small shop. Embrace experimentation, document results, and progressively tackle more complex designs, optimize curing, and expand substrates—while keeping the process efficient and scalable. The journey from novice to mastery in Screen printing is iterative, creative, and deeply rewarding. |
Summary
Conclusion: The Path to Mastery in Screen Printing