
DTF transfers for custom apparel have transformed the way designers, hobbyists, and small brands approach fabric printing. By using a direct-to-film (DTF) process, you can achieve vibrant designs on a wide range of fabrics with relatively simple equipment and flexible production workflows. This guide dives into everything you need to know about DTF transfers for custom apparel, including how the process works, how it compares to other methods, the materials involved, and practical tips for getting the best results. For those weighing options, understanding the strengths and trade-offs of different textile methods can help you plan smarter productions. Whether you’re crafting merch for a fundraiser or launching a small line, this overview sets the stage for choosing DTF transfers with confidence.
In simpler terms, this is a film-based garment decoration method that relies on printed PET film layered with adhesive and heat to embed a design into the fabric. The technique often requires a white underbase for darker fabrics and uses a curing step to ensure durability. When comparing options, designers often encounter DTG vs DTF and heat transfer vs DTF as shorthand for asking which approach best balances color, texture, and washability. Understanding these terms through an LSI lens helps you communicate with suppliers and select the right workflow for your apparel line.
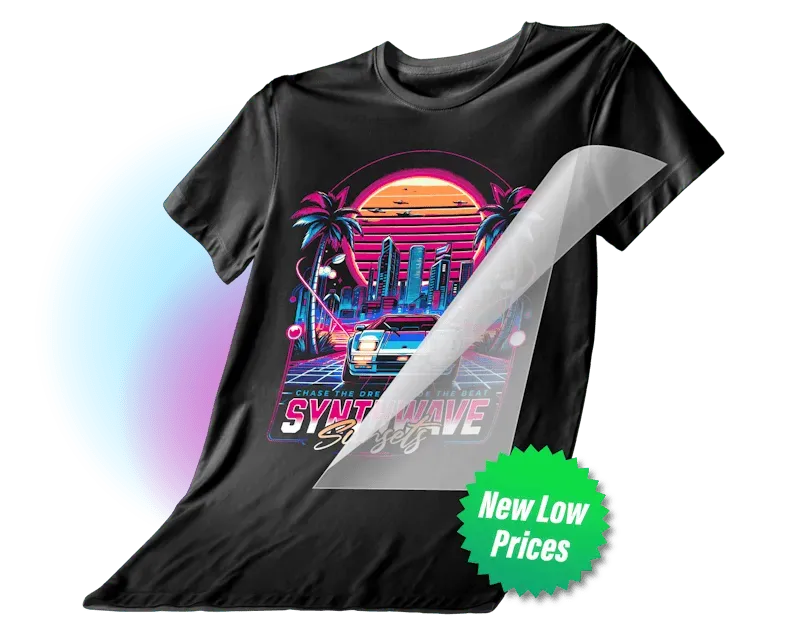
DTF Transfers for Custom Apparel: Printing Fundamentals
DTF transfers for custom apparel introduce a practical workflow around a direct-to-film process to move vibrant designs onto fabric. In this approach, artwork is printed onto a clear PET film using DTF printing, with a white underbase used to boost opacity on dark fabrics. The method offers flexibility across fabrics, blends, and garment types, making it accessible to designers, hobbyists, and small brands. Understanding the fundamentals of the direct-to-film process helps you plan materials, printer settings, and curing steps for durable results.
Applying DTF transfers requires careful attention to color profiles, film translucency, and powder adhesion. The transfer sheet carries the design through the heat press, where the adhesive bonds to fibers as the film is peeled away. Achieving consistent results hinges on precise alignment, appropriate temperature, and correct pressure during transfer.
DTG vs DTF: Choosing Between Direct-to-Film and Direct-to-Garment
DTG vs DTF is a common consideration when planning a custom apparel line. The DTG route uses direct-to-garment printing on light fabrics and often requires pretreatment to achieve color vibrancy, while DTF relies on a printed film that is transferred with heat, offering strong opacity on dark fabrics and broad substrate compatibility. The DTG vs DTF comparison helps you decide based on fabric type, color accuracy, and production workflow.
Budget, run size, and production speed influence the choice. DTF tends to be more scalable for small runs and multi-color designs, while DTG can offer extremely soft hand feel on qualifying fabrics. When evaluating DTG vs DTF, consider ink costs, maintenance, and cost per piece.
Direct-to-Film Process: From Design to Transfer
The direct-to-film process begins with artwork prepared in high resolution and color-accurate profiles. The design is printed onto clear PET film using DTF printing inks, including a white underbase for dark fabrics to preserve opacity and color richness.
After printing, a powdered adhesive is applied and cured to create a durable transfer surface. The sheet can then be aligned on a garment and transferred with a heat press, with the film peeled away to reveal the final design.
Applying DTF Transfers: Best Practices for Alignment and Adhesion
Pre-press the garment to remove moisture and create a flat surface, then place the transfer with the printed side facing the correct direction and align carefully. During transfer, use a heat press at the typical range (around 180–210°C / 356–410°F) with even pressure to ensure complete adhesive bonding.
Press times often range from 15–30 seconds depending on material and ink system, followed by a brief cooldown before removing the carrier. Additional curing after transfer can improve wash durability and reduce scuffing at the edges.
Heat Transfer vs DTF: Choosing the Right Method for Your Garments
When weighing heat transfer vs DTF, think about the overall production goals. Heat transfer vinyl can be quick for small runs with simple designs, but may require heavier feel and longer setup for multi-color artwork; DTF typically delivers vibrant color on a wide range of fabrics and blends with a more flexible hand.
Consider longer-term durability, wash performance, and scalability. Heat transfer methods often require lamination or vinyl separation, while DTF uses film-based transfers that can be more forgiving on odd fabrics and variable textures.
Color Management, Materials, and Troubleshooting in DTF Transfers
Color management is central to reliable results, with attention to white underbase opacity, ICC profiles, and film translucency that influence hue accuracy. Selecting compatible film stock, ink sets, and powders affects color vibrancy and adhesion in DTF transfers for custom apparel.
Common issues include cracking, lifting, or color shifts, which can often be resolved by adjusting pre-press conditions, powder curing, or transfer temperature and pressure. Keeping a test gallery of fabrics and color charts helps you calibrate the workflow before larger productions.
Frequently Asked Questions
What are DTF transfers for custom apparel and how do they work?
DTF transfers for custom apparel are created by printing a design onto a clear PET film using water-based inks, typically with a white underbase on dark fabrics. A transforming powder is applied, cured, and the transfer sheet is then pressed onto a garment with heat. When heat and pressure are applied, the ink and adhesive bond to the fabric and the film is peeled away, leaving a vibrant, durable design suitable for a wide range of fabrics.
DTG vs DTF: how do these direct-to-film processes compare for custom apparel?
DTG vs DTF highlights two different approaches. DTG printing offers very fine detail and a soft hand feel on light fabrics but may require pretreatment and is more fabric-specific. DTF printing, or the direct-to-film process, provides strong color, good opacity on dark fabrics, and a flexible workflow that works well for small runs and varied fabric blends. For many small brands, DTF transfers balance cost, speed, and color accuracy on multiple fabrics.
Heat transfer vs DTF: which method should you choose for your custom apparel?
Heat transfer vs DTF presents trade-offs. Heat transfer vinyl (HTV) offers durability and a tactile finish but can be less scalable for complex multi-color artwork. DTF transfers deliver vivid color, broad compatibility with fabrics, and simpler multi-color designs with a smoother workflow for small to medium runs. Your choice depends on fabric type, desired hand feel, production volume, and budget.
What materials and equipment do I need to start with DTF transfers for custom apparel?
To begin with DTF transfers for custom apparel, you’ll need a DTF-capable printer with compatible inks, clear PET transfer film, white ink capability for underbases on dark fabrics, adhesive powder, a curing device, and a heat press with adjustable temperature, time, and pressure. You’ll also want test garments and color charts to calibrate your workflow and ensure consistent results.
How do you apply DTF transfers for custom apparel using a heat press?
Applying DTF transfers with a heat press involves pre-pressing the garment to remove moisture, aligning the transfer on the fabric, pressing at about 180–210°C (356–410°F) with medium to firm pressure (roughly 40–60 psi), for 15–30 seconds, then cooling before removing the carrier film. A post-press cure may be required to improve wash durability depending on the ink and powder system.
What are common issues and troubleshooting tips for DTF transfers for custom apparel?
Common issues include cracking, lifting, color shifts, or poor adhesion. Troubleshooting tips cover ensuring proper pre-press conditions, correct powder curing, accurate transfer temperature, time, and pressure, and verifying film quality and white underbase opacity. Calibrating settings with test sheets across fabrics and ensuring proper alignment during transfer can prevent most problems and improve wash durability.
| Topic | Key Points |
|---|---|
| What are DTF transfers and how they work? | DTF transfers involve printing a design on clear PET film using water-based inks (with a white underbase for dark fabrics), applying adhesive powder, curing, and then transferring the design to fabric with heat and pressure. The result is a durable, vibrant print with good color reproduction. |
| The DTF workflow steps | Key steps include: design artwork with proper color profiles and high resolution; print on PET film (white underbase for light/dark fabrics); apply and cure adhesive powder; align the transfer on the garment; use a heat press at the right temperature, time, and pressure; peel away the film after transfer and complete any required post-transfer cure. |
| Materials and setup | Core components include a DTF-capable printer with compatible inks, clear PET transfer film, white ink capability for underbase, adhesive powder, a curing device, a heat press with adjustable settings, test garments, and color charts to calibrate the workflow. |
| DTF printing vs DTG vs HTV | DTF offers strong color vibrancy, good opacity on dark fabrics, and forgiving results for small runs. DTG provides high detail and soft hand on light fabrics but may need pretreatment and is fabric-dependent. HTV is durable and easy for small jobs but less scalable for complex, multi-color designs and can feel heavier on fabric. |
| Practical differences within DTF workflows | Differences include film quality and translucency, powder adhesion and curing temperatures, heat press parameters, and how well the adhesive penetrates fabric fibers for durability. |
| Applying DTF transfers: best practices | Pre-press the garment to remove moisture, align the transfer precisely, and press at roughly 180–210°C (356–410°F) with medium–firm pressure (about 40–60 psi) for 15–30 seconds. Allow cooling before removing the carrier film and perform any required post-press cure. |
| Care, durability, and washability | DTF designs can be highly durable when properly cured. Wash garments inside out in cold to warm water with mild detergents, avoid chlorine bleach, minimize high-heat drying, and protect prints from prolonged direct sunlight. |
| Design considerations and color management | Use high-resolution artwork (≥300 dpi at final size), include a white underbase for dark fabrics, apply appropriate color profiles/ICC settings, and consider layering or masking for complex designs to maintain color accuracy. |
| Common myths and troubleshooting tips | Myths include blanket claims of lower cost or durability across all volumes. In reality, costs depend on ink, powder, film, and run size; durability is strong when cured and cared for. If issues arise (cracking, lifting, color shifts), adjust pre-press, curing, and transfer temperature/pressure. |
| Choosing a supplier and optimizing settings | Evaluate printer/ink compatibility with the film stock, powder quality, supplier support, color-matching capabilities, and availability of test sheets. Document recommended settings for different fabrics and start with a small test batch to dial in color and adhesion. |