
DTF printer maintenance is the cornerstone of reliable, high-quality textile transfers, keeping your workflow smooth and predictable. A smart routine combines regular DTF printer cleaning, careful calibration steps, and consistent care to prevent defects. By following a practical DTF maintenance checklist, you reduce head clogs, improve color accuracy, and minimize downtime. Tackling issues with prompt troubleshooting and proactive care helps you get more life from each printer and material batch. Whether you run a small shop or a larger operation, building these habits today pays off with consistent transfers and fewer surprises.
Think of it as preventive maintenance for your ink transfer printer, a disciplined program that guards performance. Regular upkeep covers head cleaning, nozzle checks, calibration routines, and careful media handling to sustain color fidelity across batches. Other terms for this practice include equipment care, routine service, and a maintenance schedule that minimizes downtime and material waste. A solid upkeep strategy also embraces environmental controls, proper storage of inks and films, and proactive troubleshooting before issues escalate. Adopting this approach helps keep the device reliable, efficient, and ready for high-volume production with consistent transfer quality.
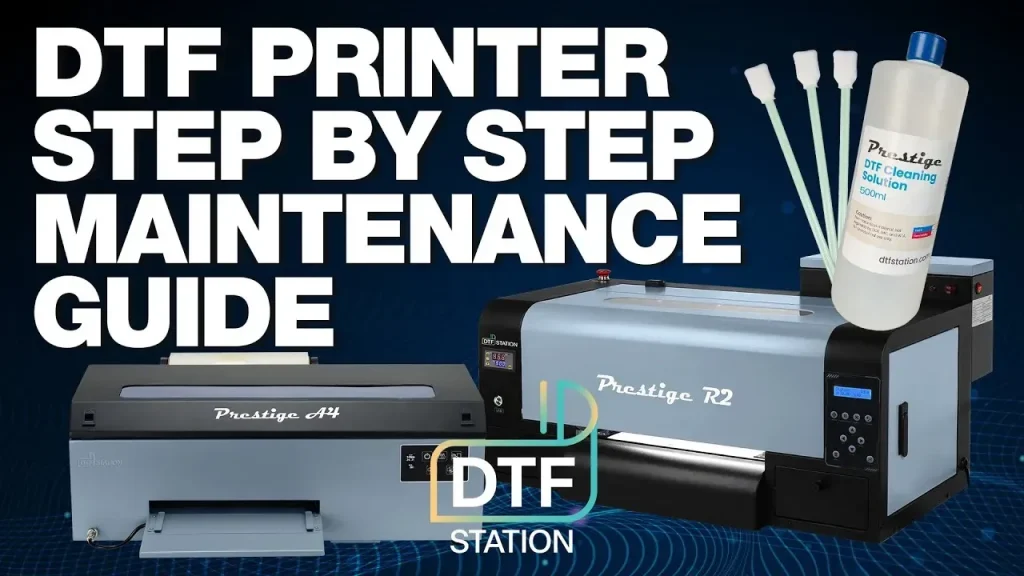
DTF Printer Maintenance: Essential Practices for Reliable Transfers
DTF printer maintenance is the backbone of reliable, high-quality textile transfers. Regular cleaning, careful calibration, and consistent care prevent print defects, extend the life of your equipment, and keep production running smoothly. Whether you’re operating a small shop or a busy print house, a solid maintenance routine pays off with fewer head clogs, tighter color accuracy, and less downtime.
In practice, you’ll implement a practical maintenance plan that centers on clear, repeatable steps. Start with a simple daily routine, then build in weekly and monthly tasks, and finally schedule periodic professional checks as needed. A structured approach—often summarized in a DTF maintenance checklist—helps you stay consistent, protect your investment, and deliver dependable transfers every time. Pair these practices with reliable DTF printer care tips to extend overall equipment lifespan.
DTF Printer Cleaning Protocols for Peak Reliability
DTF printer cleaning is the first line of defense against print defects. A daily quick-clean routine helps remove dust, film residue, and minor ink buildup before they affect head performance. Begin by powering down and unplugging the device, wipe the exterior with a soft, lint-free cloth, and inspect cartridges for leaks. Gently dampen a lint-free swab with a small amount of IPA and carefully wipe the print head vicinity, avoiding saturation.
Weekly deep clean targets the components that collect dried ink: the capping station, wiper blade, seals, and ink lines. Run the printer’s nozzle check and perform a thorough head cleaning if gaps appear. Flush ink lines according to the manufacturer’s guidance if needed, then wipe interior surfaces to minimize dust buildup that can transfer to transfer film and affect adhesion.
DTF Printer Calibration Steps to Ensure Color Fidelity
DTF printer calibration steps are essential to achieving repeatable color and alignment. Start with a factory-calibrated baseline, then tailor it to your specific inks, transfer films, and substrates. Follow a structured sequence that includes nozzle checks, test patterns, and color charts to lock in consistency across the color gamut.
Alignment and bed/feed path calibration help prevent skewed images and banding. Use the printer’s alignment tests, verify media guides, and adjust pinch rollers or feed guides as recommended by the manufacturer. After each adjustment, reprint a color test chart to confirm that reds, greens, and blues sit correctly across the print area and that color density remains stable.
DTF Maintenance Checklist: A Practical Guide for Consistent Output
A well-documented maintenance calendar keeps everyone focused on the right tasks. Create daily, weekly, monthly, and quarterly items, and mark completion as you go. A robust DTF maintenance checklist helps standardize care, reduces guesswork, and makes it easier to compare performance across jobs.
Maintain simple logs of issues and actions taken, then review trends to identify recurring problems. Regularly updating the checklist and training staff on its use minimizes downtime, preserves head assemblies and ink systems, and supports a steady path to high-quality, repeatable transfers.
DTF Printer Care Tips for Small Shops and High-Volume Environments
DTF printer care tips emphasize a stable environmental setup. Maintain a consistent ambient temperature (roughly 20–25°C) and moderate humidity, shield the machine from direct sunlight and heavy dust, and use a cover when idle. These precautions help prevent drift, reduce cleaning frequency, and sustain long-term reliability.
Inks and media require careful handling. Store inks in a cool, dark place and seal containers tightly after use to prevent evaporation and contamination. Use approved transfer films and substrates; substandard media can accelerate wear and create more frequent cleaning cycles. Following these care tips keeps print heads cleaner and ink paths clearer for longer.
DTF Printer Troubleshooting: Common Issues and How Maintenance Helps
Even with a solid maintenance routine, issues can surface. Color drift or dull prints often point to calibration or cleaning gaps, while banding or uneven densities might indicate misalignment or roller tension problems. Regular maintenance reduces these symptoms, and when they appear, retrace steps with a nozzle check, alignment tests, and ink-level verifications as part of your DTF printer troubleshooting.
If problems persist after routine checks, escalate to professional service. A technician can inspect dampers, seals, and internal ink channels for wear that isn’t visible externally. Keeping a thorough maintenance log and documenting when problems began helps technicians pinpoint root causes quickly, minimize downtime, and protect your investment.
Frequently Asked Questions
What is the first step in DTF printer maintenance and why is DTF printer cleaning important?
Begin with a daily quick-clean routine: power off and unplug, wipe the exterior, inspect cartridges, and wipe the print head area with a lint-free cloth dampened with IPA. DTF printer cleaning removes ink residue and dust that can cause head clogs, color shifts, and misregistration, protecting print quality and extending equipment life.
What are the recommended DTF printer calibration steps to ensure color accuracy?
Start with a factory calibration, then perform color calibration basics and alignment tests, and run nozzle checks to verify performance. Following these DTF printer calibration steps reduces drift and banding, delivering repeatable, color-accurate transfers.
How often should you follow the DTF maintenance checklist and what items should it include?
Follow a regular cadence: daily quick-clean, weekly nozzle tests and head cleaning, monthly ink-line purge and alignment checks, and quarterly professional servicing if needed. A DTF maintenance checklist keeps tasks visible and helps prevent defects.
What troubleshooting tips are common in DTF printer troubleshooting when prints show banding or color drift?
Check for nozzle clogs with a nozzle check, perform head cleanings, verify ink levels and media compatibility, and re-run alignment and color tests. This DTF printer troubleshooting approach helps identify whether the issue stems from cleaning, calibration, or hardware wear.
What environmental and handling practices form good DTF printer care tips?
Maintain stable room temperature and humidity, keep dust away, cover the printer when idle, and store inks and media properly. These DTF printer care tips extend component life and maintain consistent print quality.
When should you seek professional service for DTF printer maintenance and what signals indicate it is time?
If you still experience persistent clogging after cleaning, ongoing color drift after calibration, or unusual noises and worn seals or rollers, consult a service technician. Regular professional maintenance can catch wear early and minimize downtime.
| Key Point | Summary |
|---|---|
| Why maintenance matters | DTF printers are precision devices. They rely on delicate print heads, cap stations, ink channels, rollers, and alignment mechanisms that can drift if ignored. Regular cleaning and calibration prevent color shifts, banding, ghosting, or clogged nozzles. Routine maintenance reduces these issues, saves material costs, and protects the investment you have made in your workflow. |
| Cleaning: foundation | Cleaning removes ink residue, dust, and film debris from critical areas so the printer can perform at peak precision. |
| Daily quick-clean routine | – Power off and unplug the printer before starting. – Remove loaded media and wipe the exterior with a soft lint-free cloth. – Inspect the ink cartridges or reservoirs for leaks and ensure everything is seated properly. – Gently wipe the print head vicinity with a lint-free cloth dampened with a small amount of isopropyl alcohol (IPA). Avoid saturating components. – Check the feed rollers for lint or film buildup and wipe them lightly. |
| Weekly deep clean | – Run the built in print head cleaning function and perform a nozzle check to identify gaps indicating clogs. – Clean the capping station, wiper blade, and any exposed seals with IPA and a lint-free swab. These parts collect dried ink. – Inspect the purge station and ink lines for dried residue; flush according to the manufacturer guidance if needed. – Wipe down interior surfaces that contact ink or transfer film to minimize dust. |
| Monthly maintenance wash | – Conduct a thorough purge and flush of ink lines if the system supports it, following the manufacturer instructions. – Check and clean the solvent or cleaning tanks as applicable to your model. – Inspect seals, gaskets, and dampers for wear and replace as needed to prevent leaks. – Calibrate feed and transport paths if you notice misalignment during cleaning cycles. |
| Tips for effective cleaning | – Use lint-free cloths and high-purity IPA or manufacturer approved cleaning fluids. – Never use abrasive brushes or solvents not recommended for the printer materials. – Allow components to dry fully before reassembly or powering back on. – Keep the work area clean and free of dust; a tidy environment supports better long term performance. |
| Calibration: dialing in color and alignment | Calibration is the second pillar of DTF printer maintenance. It ensures color accuracy, consistent densities, and proper alignment across prints. You will want to perform calibration routines regularly, especially after major cleaning, ink changes, or if you notice color drift or misregistration. |
| Color calibration basics | – Color calibration aligns the printer output with reference values so that reds, greens, and blues render as intended on textiles. Start with a factory calibration, then adapt to inks, transfer films, and substrates. |
| Alignment and bed/feed path calibration | – Over time, media feeding can become misaligned, leading to skewed images or banding. Run the printer alignment tests, check the media guides, and adjust the pinch rollers or feed guides as recommended by the manufacturer. Even small misalignments can produce noticeable defects on transfers. |
| Calibration steps you can follow | – Run a nozzle check and print a test pattern across the carriage path to reveal skew or banding. – Use the alignment marks on a test print to adjust feed length, head gap, and transport tension. – Reprint a color test chart after adjustments to verify consistency across the color gamut. – If applicable, run a dedicated color profile calibration to tailor profiles to inks and substrate. |
| The benefits of regular calibration | Regular calibration helps you maintain predictable results, reduces trial-and-error prints, and minimizes waste. It also makes it easier to scale production, as operator skills and print quality become more consistent from job to job. |
| Care routines and environmental considerations | Beyond cleaning and calibration, ongoing care supports longevity and reliability. Small habits like keeping a stable room temperature, controlling humidity, and protecting the printer from dust yield big dividends over time. |
| Environmental setup | – Aim for a stable ambient temperature, typically between 20–25 C (68–77 F), and moderate humidity. – Keep the printer away from direct sunlight, heat vents, and areas with heavy dust or vibrations. – Use a cover when not in use to cut down on dust accumulation. |
| Handling ink and media with care | – Store inks in a cool, dark place and seal containers tightly after use to prevent evaporation and contamination. – Use the recommended transfer films and substrates; substandard media can cause premature wear and more frequent cleaning cycles. – When changing inks, perform a purge run to flush out residual colors and avoid cross-contamination. |
| Scheduling a maintenance calendar | – Create a simple maintenance calendar that includes daily quick-clean checks, weekly deep-clean tasks, monthly flushes, and quarterly professional servicing if needed. – Document any issues you notice and the steps taken to address them. A maintenance log helps you spot recurring problems and track improvement. |
| Troubleshooting common issues tied to maintenance | – Color drift or dull prints: Re-run calibration and color profiling; verify ink levels and media compatibility; inspect the print head for clogs. – Banding or uneven densities: Check alignment, feed path, and roller tension; perform nozzle cleanings and test prints. – Ghosting or image bleed: Inspect the transfer film path and ensure no residual ink is present on films that could transfer unexpectedly; verify cap seal integrity. – Nozzle clogs after long idle periods: Run a thorough nozzle check and perform a series of controlled head cleanings; consider a solvent flush if advised by the manufacturer. |
| DTF maintenance checklist: a practical guide | – Daily: exterior wipe, quick print head proximity cleaning, verify media loaded correctly. – Weekly: nozzle test, print head cleaning, capping station and wiper blade inspection. – Monthly: full ink line purge (if supported), internal wipe-down, alignment verification, calibration run. – Quarterly: comprehensive inspection by a technician if possible, software and firmware updates, film and substrate compatibility review. – As needed: replace worn seals, dampers, or rollers; inspect fans and air paths for dust buildup. |
| Advanced care and when to seek professional help | – Some maintenance tasks require specialized tools, parts, or manufacturer approved fluids. – If you notice persistent issues such as persistent clogging despite cleaning, persistent color drift after calibration, or mechanical wear (strange noises, unusual vibrations), consult a service technician. – Regular professional servicing can catch wear before it becomes costly downtime and helps protect the overall health of your DTF printer. |
Summary
| Key Point | Summary |
|---|---|
| Why maintenance matters | DTF printers are precision devices. They rely on delicate print heads, cap stations, ink channels, rollers, and alignment mechanisms that can drift if ignored. Regular cleaning and calibration prevent color shifts, banding, ghosting, or clogged nozzles. Routine maintenance reduces these issues, saves material costs, and protects the investment you have made in your workflow. |
| Cleaning: foundation | Cleaning removes ink residue, dust, and film debris from critical areas so the printer can perform at peak precision. |
| Daily quick-clean routine | – Power off and unplug the printer before starting. – Remove loaded media and wipe the exterior with a soft lint-free cloth. – Inspect the ink cartridges or reservoirs for leaks and ensure everything is seated properly. – Gently wipe the print head vicinity with a lint-free cloth dampened with a small amount of isopropyl alcohol (IPA). Avoid saturating components. – Check the feed rollers for lint or film buildup and wipe them lightly. |
| Weekly deep clean | – Run the built in print head cleaning function and perform a nozzle check to identify gaps indicating clogs. – Clean the capping station, wiper blade, and any exposed seals with IPA and a lint-free swab. These parts collect dried ink. – Inspect the purge station and ink lines for dried residue; flush according to the manufacturer guidance if needed. – Wipe down interior surfaces that contact ink or transfer film to minimize dust. |
| Monthly maintenance wash | – Conduct a thorough purge and flush of ink lines if the system supports it, following the manufacturer instructions. – Check and clean the solvent or cleaning tanks as applicable to your model. – Inspect seals, gaskets, and dampers for wear and replace as needed to prevent leaks. – Calibrate feed and transport paths if you notice misalignment during cleaning cycles. |
| Tips for effective cleaning | – Use lint-free cloths and high-purity IPA or manufacturer approved cleaning fluids. – Never use abrasive brushes or solvents not recommended for the printer materials. – Allow components to dry fully before reassembly or powering back on. – Keep the work area clean and free of dust; a tidy environment supports better long term performance. |
| Calibration: dialing in color and alignment | Calibration is the second pillar of DTF printer maintenance. It ensures color accuracy, consistent densities, and proper alignment across prints. You will want to perform calibration routines regularly, especially after major cleaning, ink changes, or if you notice color drift or misregistration. |
| Color calibration basics | – Color calibration aligns the printer output with reference values so that reds, greens, and blues render as intended on textiles. Start with a factory calibration, then adapt to inks, transfer films, and substrates. |
| Alignment and bed/feed path calibration | – Over time, media feeding can become misaligned, leading to skewed images or banding. Run the printer alignment tests, check the media guides, and adjust the pinch rollers or feed guides as recommended by the manufacturer. Even small misalignments can produce noticeable defects on transfers. |
| Calibration steps you can follow | – Run a nozzle check and print a test pattern across the carriage path to reveal skew or banding. – Use the alignment marks on a test print to adjust feed length, head gap, and transport tension. – Reprint a color test chart after adjustments to verify consistency across the color gamut. – If applicable, run a dedicated color profile calibration to tailor profiles to inks and substrate. |
| The benefits of regular calibration | Regular calibration helps you maintain predictable results, reduces trial-and-error prints, and minimizes waste. It also makes it easier to scale production, as operator skills and print quality become more consistent from job to job. |
| Care routines and environmental considerations | Beyond cleaning and calibration, ongoing care supports longevity and reliability. Small habits like keeping a stable room temperature, controlling humidity, and protecting the printer from dust yield big dividends over time. |
| Environmental setup | – Aim for a stable ambient temperature, typically between 20–25 C (68–77 F), and moderate humidity. – Keep the printer away from direct sunlight, heat vents, and areas with heavy dust or vibrations. – Use a cover when not in use to cut down on dust accumulation. |
| Handling ink and media with care | – Store inks in a cool, dark place and seal containers tightly after use to prevent evaporation and contamination. – Use the recommended transfer films and substrates; substandard media can cause premature wear and more frequent cleaning cycles. – When changing inks, perform a purge run to flush out residual colors and avoid cross-contamination. |
| Scheduling a maintenance calendar | – Create a simple maintenance calendar that includes daily quick-clean checks, weekly deep-clean tasks, monthly flushes, and quarterly professional servicing if needed. – Document any issues you notice and the steps taken to address them. A maintenance log helps you spot recurring problems and track improvement. |
| Troubleshooting common issues tied to maintenance | – Color drift or dull prints: Re-run calibration and color profiling; verify ink levels and media compatibility; inspect the print head for clogs. – Banding or uneven densities: Check alignment, feed path, and roller tension; perform nozzle cleanings and test prints. – Ghosting or image bleed: Inspect the transfer film path and ensure no residual ink is present on films that could transfer unexpectedly; verify cap seal integrity. – Nozzle clogs after long idle periods: Run a thorough nozzle check and perform a series of controlled head cleanings; consider a solvent flush if advised by the manufacturer. |
| DTF maintenance checklist: a practical guide | – Daily: exterior wipe, quick print head proximity cleaning, verify media loaded correctly. – Weekly: nozzle test, print head cleaning, capping station and wiper blade inspection. – Monthly: full ink line purge (if supported), internal wipe-down, alignment verification, calibration run. – Quarterly: comprehensive inspection by a technician if possible, software and firmware updates, film and substrate compatibility review. – As needed: replace worn seals, dampers, or rollers; inspect fans and air paths for dust buildup. |
| Advanced care and when to seek professional help | – Some maintenance tasks require specialized tools, parts, or manufacturer approved fluids. – If you notice persistent issues such as persistent clogging despite cleaning, persistent color drift after calibration, or mechanical wear (strange noises, unusual vibrations), consult a service technician. – Regular professional servicing can catch wear before it becomes costly downtime and helps protect the overall health of your DTF printer. |
DTF printer maintenance is an ongoing practice that pays dividends in print quality, color fidelity, and equipment longevity. Through consistent cleaning, regular calibration, and careful care, you will minimize downtime and maximize throughput. Start with a simple daily cleaning habit, adopt a clear calibration routine, and implement a practical maintenance calendar. Your future prints and your bottom line will thank you.