
UV DTF transfer prep begins long before the design is printed, with clean garments and precise alignment setting the stage for vibrant results. A well-executed prep pipeline dramatically improves color fidelity, edge crispness, and the durability of the finished product. This article presents a simple, practical prep checklist designed for small shops, studios, or even at-home setups, with a focus on garment prep for DTF. By following these steps, you’ll reduce common issues like wrinkling, misalignment, and poor adhesion, and you’ll set a solid foundation for successful transfers every time. With consistent execution, UV DTF prep becomes a repeatable process that yields reliable results day after day.
Think of the preparation phase for UV-printed transfers as a careful pre-press ritual rather than a single action. Anti-shift measures begin with fabric cleaning, drying, and flattening to minimize movement during transfer. The process also emphasizes moisture control, substrate compatibility, and precise alignment to keep color placement consistent across batches. By framing the topic with related concepts and varied terminology—pre-press readiness, substrate conditioning, and finishing care—the underlying steps remain the same: remove moisture, create a smooth surface, and verify materials before heat is applied.
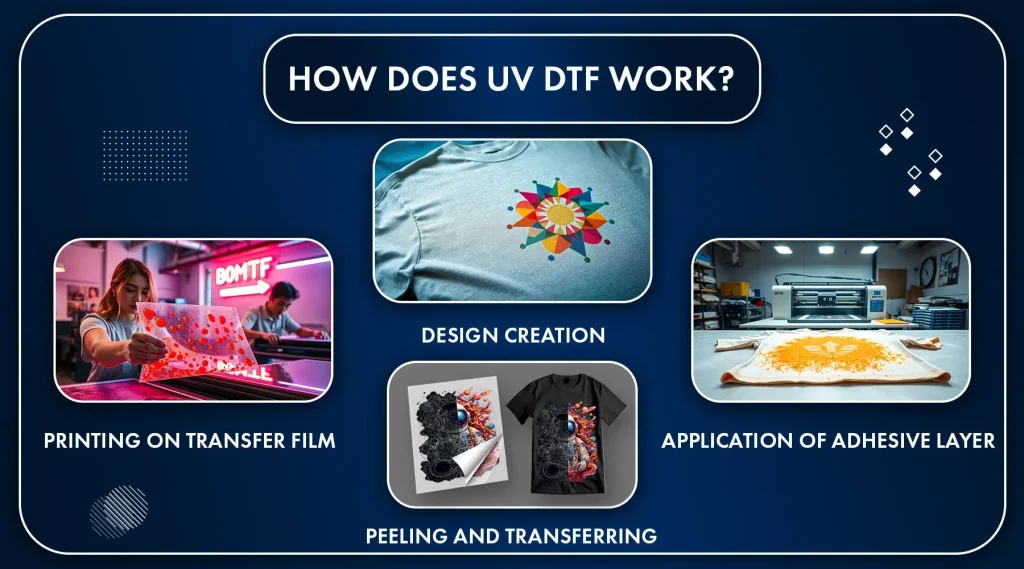
1. UV DTF Transfer Prep: Foundations for Color, Alignment, and Durability
In UV DTF transfer prep, the prep stage sets the foundation for vibrant color, precise alignment, and durable results. The UV aspect amplifies color fidelity, so a clean, well-prepared substrate is essential. This makes the concepts of garment prep for DTF and general DTF transfer tips more important than ever, because every micro-detail during prep translates to edge crispness and long-term adhesion.
A practical approach begins with a repeatable routine: clean, dry garments, accurate pre-press, and careful alignment. Documenting heat press settings for DTF and the sequence of steps helps achieve predictable outcomes across batches. By keeping the prep consistent, you reduce misregistration, curling, and transfer bleed, which are the most common culprits in UV-based workflows.
2. Mastering Garment Prep for DTF: Cleanliness, Pre-Shrinking, and Surface Readiness
Garment prep for DTF starts long before the design is applied. Ensure garments are clean, dry, and free from residues that could interfere with adhesion. Pre-shrinking is especially important for cotton-rich fabrics and blends, helping minimize post-transfer shrinkage that can misalign the design after washing.
Inspect for surface defects, loose threads, fluff, or imperfect finishes that might affect the print area. A quick lint run and a test patch in a hidden area provide early indicators of how the fabric will respond. This attention to surface readiness is a core aspect of reliable DTF garment care and aligns with practical DTF transfer tips.
3. DTF Transfer Tips and Alignment Techniques for Crisp Edges
Precise alignment is the cornerstone of a professional-looking transfer. Use grid mats, clear templates, or tape guides to position designs, then secure the garment with clamps or tape to prevent shifting. These alignment practices are central to DTF transfer tips that emphasize repeatability and accuracy.
Before pressing, perform a dry run to verify the position on both the chest and any sleeves or pockets. A mock alignment helps you catch misplacements without wasting material, reinforcing a reliable workflow. This step integrates the concept of garment prep for DTF with practical alignment techniques that yield crisp edges.
4. Heat Press Settings for DTF: Find Your Ideal Time, Pressure, and Temperature
Effective heat press settings for DTF depend on the transfer film, adhesive, and fabric. Start with moderate pressure and a brief initial pre-press, then proceed to the final press. Keeping a log of temperatures, times, and pressure for each fabric type supports consistency and aligns with the broader set of DTF transfer tips.
Documenting and repeating your heat press parameters for similar fabrics and designs is a practical extension of the prep process. Adjustments may be needed for blends or dark fabrics to optimize adhesion and image clarity. By building a library of tested settings, you reduce reprints and maintain high-quality results.
5. Fabric and Material Considerations for UV DTF Transfers
Not all fabrics react the same way to UV DTF transfers. Natural fibers like cotton typically provide strong adhesion and vibrant reproduction, while polyester blends may require adjusted pre-press times or temperatures to prevent glossing or misregistration. Understanding these nuances is essential for durable, color-rich results and aligns with practical DTF garment care strategies.
Dark fabrics can enhance color depth but may demand different post-press conditioning to avoid sheen or ghosting. Light fabrics often reveal edges more clearly, so ensure lint control and surface cleanliness to maintain sharpness. Selecting fabrics with these considerations in mind supports better long-term wear and wash performance.
6. Post-Press Care and Long-Term DTF Garment Care Strategies
Post-press care is a key part of the lifetime performance of UV DTF transfers. After cooling, provide care instructions to end users and emphasize washing inside-out, using mild detergents, and avoiding high-heat drying to preserve vibrancy. This is a direct extension of DTF garment care and helps customers protect their investments.
Ongoing care guidance, including air drying or low-heat cycles and avoiding aggressive fabric softeners, reinforces the durability of the print. Documenting these instructions and including them with each order is part of a robust care strategy and complements the core concept of using DTF transfer tips to maintain quality over time.
Frequently Asked Questions
What is UV DTF transfer prep and why is it essential for quality results?
UV DTF transfer prep is the sequence of cleaning, pre-pressing, aligning, and protecting the garment before applying the UV DTF transfer. This prep is essential because it improves color fidelity, edge crispness, and adhesion, reducing reprints and extending garment life. Incorporate garment prep for DTF, DTF transfer tips, and heat press settings for DTF into your routine.
How does garment prep for DTF impact adhesion during UV DTF transfer prep?
Start with clean, pre-shrunk garments free of lint, defects, and residues. Pre-press to remove moisture, align your design precisely, and protect the surface with a silicone sheet. Effective garment prep for DTF directly improves adhesion and edge quality in UV DTF transfers.
What are key DTF transfer tips to optimize outcomes during UV DTF transfer prep?
Maintain a clean, organized workspace and sort garments by fabric type. Perform a dry run to verify alignment, and test on a small area before the final press. These DTF transfer tips help you reproduce consistent results in UV DTF prep.
What heat press settings for DTF should I use during UV DTF transfer prep across fabrics?
Begin with manufacturer guidelines and tailor settings to the fabric. Use medium pressure, a brief pre-press, followed by the final press, and document the settings for each fabric and design to ensure repeatable results in UV DTF prep.
Which fabrics matter most for UV DTF transfer prep and how does DTF garment care influence results?
Cotton and cotton-rich fabrics generally tolerate prep well, while polyester blends may require adjustments in time and temperature. Dark fabrics can deepen color but may need different post-press conditioning. Aftercare influences longevity, so follow DTF garment care guidelines like washing inside out and avoiding high heat.
How can I troubleshoot common issues in UV DTF transfer prep to minimize reprints?
If you encounter misalignment, poor adhesion, bleeding, or edge gloss, re-check alignment, perform a test on a small area, verify fabric compatibility, and adjust heat/press time per guidelines. Document your DTF transfer tips and follow DTF garment care to prevent recurrence.
| Area | Key Points |
|---|---|
| Purpose and overall goal | UV DTF transfer prep improves color fidelity, edge crispness, and the durability of the finished product; it reduces wrinkling and misalignment and sets a solid foundation for successful transfers. |
| Why UV DTF matters | The UV aspect boosts color vibrancy and makes substrate preparation more critical. In UV DTF transfer prep, consistency (washing, drying, pre-pressing, and alignment) yields predictable results and long‑term efficiency. |
| Simple prep checklist (summary) |
|
| Fabric considerations | Not all fabrics respond the same. Cotton and cotton-rich fabrics generally provide strong adhesion, while poly-blends may require adjustments in pre-press time/temperature. Dark fabrics can deepen color, light fabrics often show edges more clearly, and testing a small area is advisable before batches. |
| Tools, supplies, and setup |
|
| Troubleshooting common issues |
|
| DTF tips for prep quality |
|
| DTF garment care and post-transfer considerations |
|
| Putting it all together: repeatable workflow |
A repeatable workflow begins with clear, repeatable steps and ends with consistent results. Start by standardizing your garment prep for DTF, then train yourself or your team to follow the checklist in the exact order. Use the same press settings for similar fabrics and perform a test print on the first garment of each batch. As you gain experience with UV DTF transfer prep, you’ll refine settings, reduce reprints, and improve overall efficiency. |
Summary
UV DTF transfer prep lays the foundation for a consistent, vibrant transfer process that withstands washing and wear. By focusing on clean garments, precise alignment, moisture control, and appropriate heat application, you can achieve durable, high‑quality results. Following the prep checklist and applying DTF transfer tips—such as maintaining a clean workspace, testing fabric compatibility, and documenting heat press settings for different fabrics—helps reduce reprints and improve efficiency. With clear care instructions, you’ll extend print life and keep customers satisfied. For SEO, emphasize terms like garment prep for DTF, DTF transfer tips, heat press settings for DTF, and DTF garment care when discussing UV DTF transfer prep.