
Choosing the right embroidery hoop and stabilizers can elevate every stitch you create, from delicate motifs to bold fills. Understanding embroidery hoop types and stabilizer types helps you tailor tension, prevent fabric sag, and choose fabric stabilizers that keep edges clean and stitches even. If you’re asking how to choose embroidery hoop, you will find that different projects benefit from varied clamp styles, with machine embroidery stabilizers for speed and consistency. From lightweight linens to sturdy canvases, the right pairing keeps fabric taut, minimizes puckering, and yields crisper lines with fewer thread breaks. Begin with a small test swatch to compare tensions, experiment with a few hoop sizes, and refine your setup before tackling a full design.
Taking an LSI approach means focusing on related terms that describe the same idea: hoop variations and fabric support systems that keep designs pristine. Think in terms of frame options, stabilizing materials, and backing methods; the jargon shifts, but the goal stays the same: even tension and clean coverage. For light fabrics you might lean on light backing plus stabilizer options designed to disappear after washing, while heavy textiles benefit from sturdier frames and heavier stabilizers. In machine embroidery contexts, you will hear about backing fabrics, fusible sheets, and non-slip hoops that reduce drift during rapid stitching. By embracing this semantic approach, you can select hoop variations and stabilizer systems that match the fabric behavior and stitch density, ensuring professional results across projects.
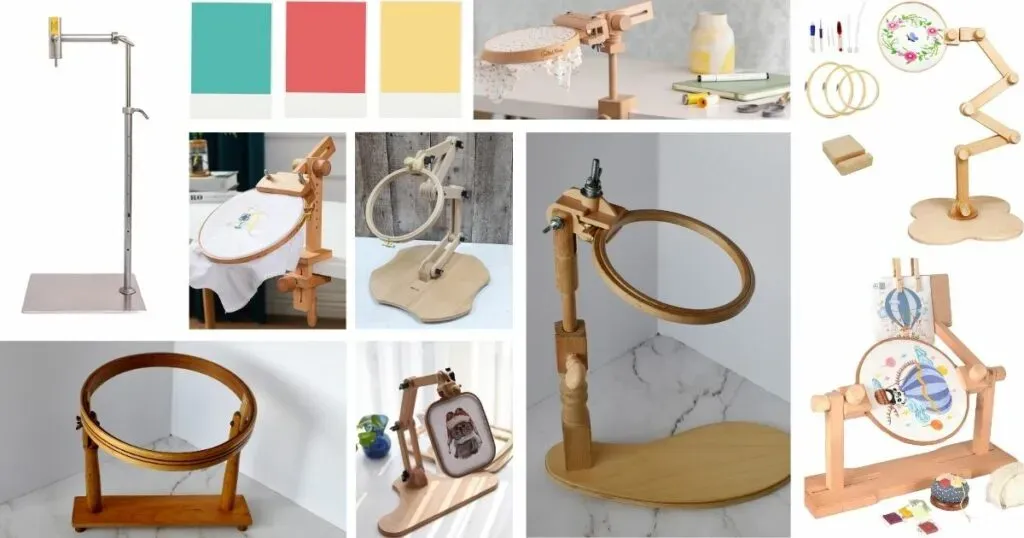
Embroidery Hoop Types and How They Influence Your Designs
The foundation of any successful embroidery piece starts with the right embroidery hoop types. Wooden, plastic, metal, and adjustable or split hoops each interact with fabric differently, affecting tension, stability, and how evenly stitches lay down. Choosing the appropriate hoop type for hand versus machine work helps minimize fabric shifting and puckering, which in turn preserves detail and color fills.
When you select hoop types, consider the design size, fabric texture, and your workflow. Larger designs often benefit from adjustable or split hoops that offer a wider throat, while delicate fabrics may do better with smooth, low-profile frames to prevent snagging. Understanding these options empowers you to tailor your setup to projects ranging from small monograms to expansive motifs, ensuring crisper lines and professional finish.
Stabilizer Types and When to Use Them for Each Fabric
Stabilizers are the backbone of stable stitching, and stabilizer types—tear-away, cut-away, wash-away, and fusible—determine how your fabric behaves during and after embroidery. Tear-away stabilizers are convenient for lightweight fabrics and simple designs, but may leave fibers behind if the density is high. Cut-away stabilizers provide robust support for dense fills and stretch fabrics, offering long-term stability but requiring careful trimming.
Wash-away stabilizers are ideal for sheer or delicate fabrics where any residue would disrupt drape, while fusible stabilizers attach quickly with heat for a flush bond. Weight and thickness also matter: lightweight stabilizers work well with smooth fabrics, while heavier stabilizers suit dense stitches on sturdy textiles. Layering stabilizers or using backing stabilizers can further improve support on tricky surfaces, helping prevent distortion and satin-stitched surfaces from becoming raised.
How to Choose the Right Embroidery Hoop for Your Project
Selecting the right embroidery hoop starts with the project’s size and the design’s dimensions. A practical rule is to choose a hoop that is at least as large as the design’s widest or tallest dimension, with a little extra margin for fabric grip and easy tightening. For larger projects, an adjustable hoop or frame that accommodates bigger designs can maintain steady tension without compromising fabric integrity.
Beyond size, consider fabric weight and stitch type. Lightweight fabrics like cotton or linen benefit from hoops that hold taut without crushing fibers, while heavier fabrics may require a sturdier frame with wider clamping areas. Ergonomics matter for long sessions, and for machine embroidery, a flat, smooth hoop helps reduce distortion and thread breakage by providing stable, uniform contact with the fabric.
Machine Embroidery Stabilizers: Ensuring Precision and Longevity
In machine embroidery, stabilizers are essential for precision and longevity. Machine embroidery stabilizers must provide consistent backing and a smooth hoop surface to minimize fabric shifting and thread breakage. Stabilizer types suitable for machine work often include stronger cut-away options for dense designs, along with tear-away or fusible choices depending on fabric and project requirements.
Experimenting with a combination of stabilizers can yield the best results: a stable backing under dense fills, plus a top stabilizer that minimizes puckering. For multi-needle machines, ensure the hoop is clean and free from oils to maximize grip and maintain alignment across multiple color stops. Regular testing on sample fabrics helps verify tension and stitch quality before committing to a final run.
Fabric Stabilizers: Picking the Best Support for Your Cloth
Fabric stabilizers determine how your chosen fabric behaves under embroidery. For delicate or slippery fabrics, fabric stabilizers—especially light wash-away or fusible options—protect the surface while preserving drape. Knit fabrics or stretch materials benefit from stabilizers with some give to prevent distortion, often pairing tear-away with a light backing.
When dealing with dense fills or heavy threads on challenging textiles, consider heavier stabilizers or layered approaches to minimize puckering and ensure a flat, even surface. Testing on a scrap of the same fabric helps you validate your choice before stitching the final piece, and backing stabilizers can provide additional support for delicate textiles that require extra stabilization.
embroidery hoop and stabilizers: A Practical Setup for Clean, Durable Stitching
A practical setup begins with testing. Hoop a small fabric sample and run a quick stitch to observe fabric behavior with your chosen stabilizer. Look for puckering, stitch gaps, thread breakage, and distortions around the design. If issues appear, adjust hoop tension, switch stabilizer types, or try a larger hoop to spread pressure more evenly.
This practical approach often reveals that pairing a larger hoop with an appropriate stabilizer—such as a cut-away for dense fills or a wash-away for sheer fabrics—produces a flat, smooth surface and durable embroidery. Remember that testing on scrap fabric, evaluating tension, and planning the setup around the fabric, design density, and stitching method will yield consistently professional results across different projects.
Frequently Asked Questions
How do embroidery hoop types and stabilizer types influence machine embroidery results?
The embroidery hoop types you choose determine fabric tension and how evenly stitches sit, while stabilizer types provide essential support to prevent puckering. For machine embroidery, use a smooth, flat hoop and pair it with a stabilizer type matched to fabric weight and stitch density (tear-away for light fabrics, cut-away for dense designs, wash-away for sheer fabrics). Always test on a scrap first.
When working with delicate fabrics, how to choose embroidery hoop and stabilizers for the best finish?
Select lightweight embroidery hoop types (wood or plastic) that grip without crushing fibers. Pair with a fabric stabilizer such as a wash-away or light tear-away, possibly with a soft backing, to preserve drape and avoid stiffness. Always run a test swatch before committing to the project.
What should I consider about embroidery hoop types and fabric stabilizers for dense satin stitches?
Use a larger embroidery hoop to reduce threading and crowding. Choose stabilizer types like cut-away or a combination (tear-away underneath with cut-away on top) to minimize puckering and keep satin stitches flat. Test on a scrap to confirm tension and alignment.
How do machine embroidery stabilizers and fabric stabilizers interact with embroidery hoop types?
Machine embroidery benefits from flat, stable hoop types and stabilizers that counter fabric movement. Match stabilizer types to fabric and stitch density; heavier fabrics need sturdier stabilizers. The right hoop, combined with appropriate stabilizers, reduces distortion and thread breakage.
How to choose stabilizer types for different fabrics and stitches within an embroidery hoop setup?
For delicate fabrics, start with light stabilizers (tear-away or wash-away) and consider a backing. For knit or stretch fabrics, use stabilizers that control give; for dense fills or heavy thread, opt for heavier stabilizers or a dual-layer approach (tear-away plus light cut-away). Align with your embroidery hoop setup and test on scrap.
What is a simple decision guide for embroidery projects that covers embroidery hoop types and stabilizers?
Step 1: identify fabric type and design density; Step 2: choose a hoop size at least matching the design with a margin; Step 3: pick a stabilizer type (tear-away, cut-away, wash-away, or fusible) based on fabric and stitches; Step 4: test on a scrap and adjust tension, hoop size, or stabilizer choice as needed.
| Topic | Key Points |
|---|---|
| Why hoop and stabilizers matter | The right hoop and stabilizers influence fabric tautness, how stitches lay down, and the final appearance. Proper support reduces puckers and helps color fills look cleaner. |
| Embroidery hoop types | Common options include wooden, plastic, metal, and adjustable/split hoops. Each has pros and cons depending on whether you’re hand or machine stitching, fabric size, and project needs. |
| Stabilizer basics | Stabilizers come in tear-away, cut-away, wash-away, and fusible types. Selection depends on fabric weight, stitch density, and whether the project will be washed or worn. |
| Stabilizer weight and layering | Weights range from lightweight to heavy; lighter stabilizers work with delicate fabrics and lighter fills, while heavier stabilizers support dense embroidery and stretchy fabrics. Layering/backing can improve stability. |
| Choosing the right hoop for the project | Pick a hoop at least as large as the design’s widest dimension and add margin for fabric margin and tightening. Larger projects may need adjustable frames to avoid distortion. |
| Stabilizer selection by fabric and stitches | Delicate fabrics: light stabilizers; knit/stretch: stabilizers with some give; dense fills/heavy thread: heavier stabilizers or combinations. Test first to ensure stability. |
| Practical approach to hoops and stabilizers | Test on a fabric swatch, observe puckering, gaps, thread breakage, and distortion. If issues appear, adjust hoop tension, stabilizer type, or add backing for better results. |
| Common mistakes to avoid | Using too small a hoop, selecting an unsuitable stabilizer for the fabric or stitch density, skipping a test on scrap fabric, over-tightening the hoop, or omitting a backing on slippery fabrics. |
| Practical tips for better results | Always test first on scrap. Start with hoop and stabilizer that match the design and fabric, then adjust. Keep the hoop clean for consistent fabric grip. If unsure, begin with light stabilizers and medium hoop. |
| Simple decision guide | 1) Fabric type; 2) Design density; 3) Hoop size; 4) Stabilizer type; 5) Test on scrap; 6) Adjust as needed before final embroidery. |