
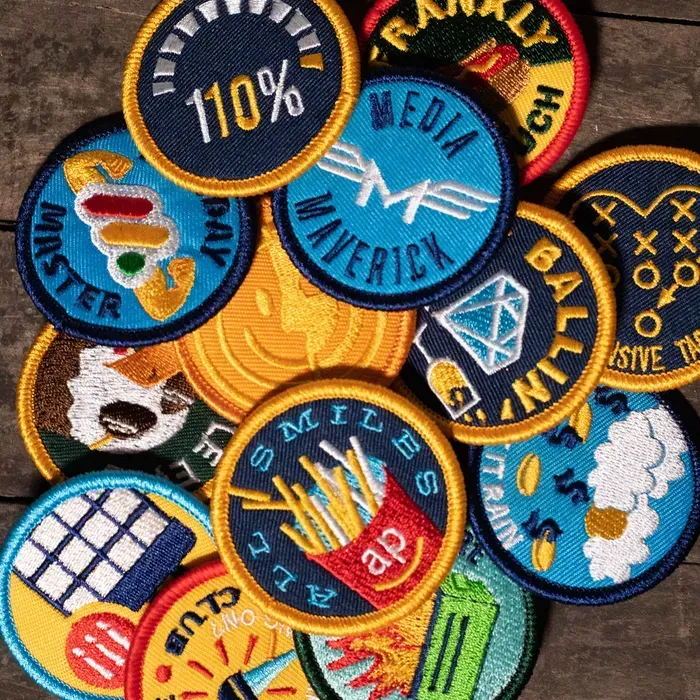
Custom patches have become a popular way to personalize clothing, bags, hats, and even gear, fueling a growing market of DIY projects and small businesses. For designers and hobbyists alike, balancing design clarity, durability, and washability is key to lasting impact. This guide covers practical steps on how to apply custom patches, including iron-on patches vs sew-on patches, so they endure countless wear cycles. Understanding patch size and placement guidelines helps ensure the patch sits flat and remains legible through washing. We’ll also share patch care and maintenance tips to extend life and keep colors vibrant.
Beyond the basic term, garment embellishments such as embroidered patches, fabric appliqués, and decorative badges offer a way to personalize outfits. When considering options like custom patches for clothing, fabric patches for apparel, or decorative badges, search engines recognize related concepts such as backing materials, application methods, and wear-resistance. This LSI-informed approach helps readers connect to ideas like patch care and maintenance, edge finishes, and durability across different fabrics. By framing the topic with synonyms and related terms, we improve clarity and accessibility while maintaining SEO relevance.
1) Custom Patches for Clothing: Choosing Quality to Extend Wear
Custom patches for clothing are the most visible signal of quality in a finished product. Mistake 1 in the guide highlights the danger of skimping on patch quality, which can lead to fraying, color bleeding, and premature failure after washes. To maximize durability and legibility, focus on patches with dense stitching, clear embroidery, and a sturdy backing—features that endure repeated wear and laundering.
When evaluating patches, request physical samples or high-resolution swatches, and look for merrowed edges or robust satin borders that resist edge fraying. High-quality patches typically retain color after washing, so ask suppliers for colorfastness tests or washing instructions. Investing in quality upfront reduces returns and builds trust with customers who expect patches that look sharp over time.
2) How to Apply Custom Patches Across Fabrics: Fabric Compatibility and Backing
Choosing the right patch backing is essential for different fabrics. Mistake 2 shows that denim and canvas respond well to iron-on backs, while stretch knits may need sew-on patches or backings designed for elastic materials. Before ordering, assess fabric tolerance to heat, bonding, and stitching to prevent puckering or heat damage.
A quick swatch test can reveal how well a patch adheres under typical use. Apply the patch with your intended method, then flex and wash the swatch to verify durability. Matching patch backing to fabric behavior is crucial for long-term performance and a professional finish on every project.
3) Patch Size and Placement Guidelines: Getting the Scale Right
Patch size matters as much as design. Mistake 3 notes that patches that are too large or too small can disrupt appearance or hinder movement. A practical approach is to measure the target area and leave a comfortable margin, such as 1/4 to 1/2 inch around the patch, to preserve legibility and balance.
If you offer multiple patch sizes, develop a clear sizing guide for different garment areas (shoulder, chest, sleeve, hat). Providing this guidance reduces returns and boosts customer satisfaction, especially for patches sold as kits or bundles and helps ensure a consistent, professional look across products.
4) Edge Finish and Durability: Finishing Edges for Longevity
Edge finish is a critical but often overlooked factor in patch longevity. Mistake 4 emphasizes that poorly finished edges peel or fray after washing. A merrow border or tightly stitched satin edge helps the patch stay crisp and resist wear, while a compatible adhesive or backing ensures the design remains intact on the fabric.
Even with sew-on patches, high-quality edge finishing reduces fraying and helps the patch sit flat. For irregular shapes, consider edge stitching that follows the contour smoothly. A strong edge finish enhances wearability and improves perceived value for customers.
5) Iron-On Patches vs Sew-On Patches: Choosing the Right Attachment Method
Attachment method affects durability, aesthetics, and care. Mistake 5 points out that iron-on patches, while convenient, aren’t always the best choice for high-friction items like jackets, backpacks, or gear. For items with heavy use or frequent washing, pairing iron-on with a sewn edge or choosing sew-on patches may be more reliable.
Offering multiple attachment options and clear care guidance helps extend patch life. Provide instructions such as turning garments inside out, washing cold, and avoiding high heat. When in doubt, test heat settings on an inconspicuous area to prevent warping or detachment over time.
6) Care, Maintenance, and Colorfastness: Patch Care and Maintenance
Even well-attached patches require proper care. Mistake 7 stresses the importance of clear laundering guidance to maintain adhesion and embroidery. Recommending gentler cycles, cold washes, and air-drying can significantly extend patch life, especially for patches with metallic threads or delicate finishes.
Colorfastness is a common concern, as patches can fade or bleed with repeated washing. Mistake 9 suggests testing colorfastness on similar fabrics and requesting documentation from suppliers. Clear care and maintenance information—along with colorfastness testing—helps preserve design integrity and keeps patches looking vibrant after many wears.
Frequently Asked Questions
What should I consider when choosing custom patches for clothing?
When selecting patches for clothing, prioritize patch quality, fabric compatibility, and backing. Look for dense embroidery, durable backing (like merrowed edges or a stable adhesive), and colorfast threads. Ask for samples or high‑resolution swatches to verify edge finish, stitching density, and wash performance. Investing in quality patches helps ensure durability and long wear.
How to apply custom patches: what methods work best for different fabrics?
To apply patches, start with a fabric test on similar material. Mark the placement, choose the appropriate method (iron‑on, sew‑on, or a combination), and follow the recommended settings. Use a pressing cloth and apply steady pressure for the advised time, then cool before handling. For high‑friction items, consider reinforcing with sewing along the edges for added durability.
Iron-on patches vs sew-on patches: which is right for high-wear items?
Iron-on patches are convenient but may not endure heavy use or frequent washing on jackets, bags, or gear. Sew-on patches generally offer greater durability in high‑wear situations. If you use iron‑on, test adhesion on a discreet area and consider adding stitching around the border. For the toughest items, use sew‑on entirely or pair iron‑on with a sewn edge for longevity.
Patch size and placement guidelines: how big and where should patches go on garments?
Follow patch size and placement guidelines by measuring the intended area and leaving a comfortable margin (roughly 1/4 to 1/2 inch around the patch when possible). Choose a size that maintains legibility of the design and suits the garment’s silhouette (shoulders, chest, sleeves, or hats). Use templates or alignment marks to ensure symmetry and a flat, professional finish.
Patch care and maintenance: what steps help patches stay sharp over time?
Provide clear care instructions to keep patches looking their best. Recommend washing cold, inside out, on gentle cycles, with mild detergent; avoid chlorine bleach; air-dry when possible or use low heat. For metallic threads or high-gloss finishes, minimize heat exposure and avoid tumble drying. Proper care reduces color fading, edge fraying, and detachment.
What testing steps should I run before mass production to ensure durable custom patches for clothing?
Run a small pilot batch that mimics real use: test attachment method, laundering cycles, abrasion, and colorfastness under sun exposure if relevant. Document results and adjust patch material, backing, or adhesive as needed. Sharing durability data or offering a short warranty can boost buyer confidence and reduce post‑purchase issues.
| Mistake | Description / Why it matters | Recommended Fix / Best Practice |
|---|---|---|
| Mistake 1: Skimping on patch quality | Low-quality patches often have inferior embroidery, thin backing, and rough edges, leading to thread breakage, color bleeding, and fraying after washing. | Choose patches with durable embroidery, dense stitching, and a backing that matches the intended application; look for clear stitching density (stitches per inch), colorfast threads, and a durable backing (merrowed edges or a sturdy iron-on adhesive); request samples to verify quality and check colorfastness. |
| Mistake 2: Ignoring fabric compatibility and backing options | Fabrics respond differently to patches; some backings work on denim, others on stretch fabrics. | Assess fabric compatibility before ordering patches. For rigid fabrics (denim/canvas) use iron-on backs or sew-on patches; for delicate/stretch fabrics, use sew-on or heat-activated adhesives designed for elastic materials; test on a swatch and match backing to fabric behavior. |
| Mistake 3: Getting the patch size wrong for the garment area | Patch size affects visibility and wear; a patch too large can overwhelm, too small may be unreadable. | Measure the intended area, consider the garment silhouette, and choose a patch size with a comfortable margin (1/4 to 1/2 inch around). Create a sizing guide for different areas (shoulder, chest, sleeve, hat) to reduce returns. |
| Mistake 4: Neglecting edge finish and durability | Edges that aren’t finished tend to peel or fray after washing. | Use merrow borders or tightly stitched satin edges; ensure adhesive compatibility for iron-ons; consider edge stitching for irregular shapes to keep the patch flat and crisp. |
| Mistake 5: Choosing the wrong attachment method for the use-case | Iron-on is convenient but not always durable for high-friction items. | Match attachment to product life cycle: for heavy-use items, pair iron-on with a sewn edge or use sew-on patches; for costumes, iron-on may suffice. Provide care instructions and test heat settings first. |
| Mistake 6: Failing to test durability before mass production | Patches can look good in sample but fail in real wear. | Run a small pilot batch mirroring expected use. Test through wash cycles and abrasion; document results, adjust materials/backing as needed, re-test; share durability results or offer a warranty. |
| Mistake 7: Inadequate laundering and care guidance | Poor care guidance can shorten patch life. | Provide clear care instructions (turn inside out, cold wash, gentle cycle; avoid chlorine bleach; air-dry or low-heat drying if compatible). Offer care cards and guidance. |
| Mistake 8: Poor placement and alignment | Crooked or misaligned patches look unprofessional and may lift sooner. | Template placement with alignment tools; mark position with chalk or removable tape; photograph the layout to ensure symmetry and flatness. |
| Mistake 9: Overlooking colorfastness and design integrity | Colors can fade or bleed if not colorfast or if fabrics bleed. | Test colorfastness on similar fabric; choose colorfast threads and backing; request colorfastness documentation from supplier. |
| Mistake 10: Ignoring legal and licensing issues | Using logos or protected designs can require permissions. | Verify licensing, obtain written permissions, or use original artwork; include a contract or authorization to protect all parties. |
Summary
Conclusion sentence placeholder