
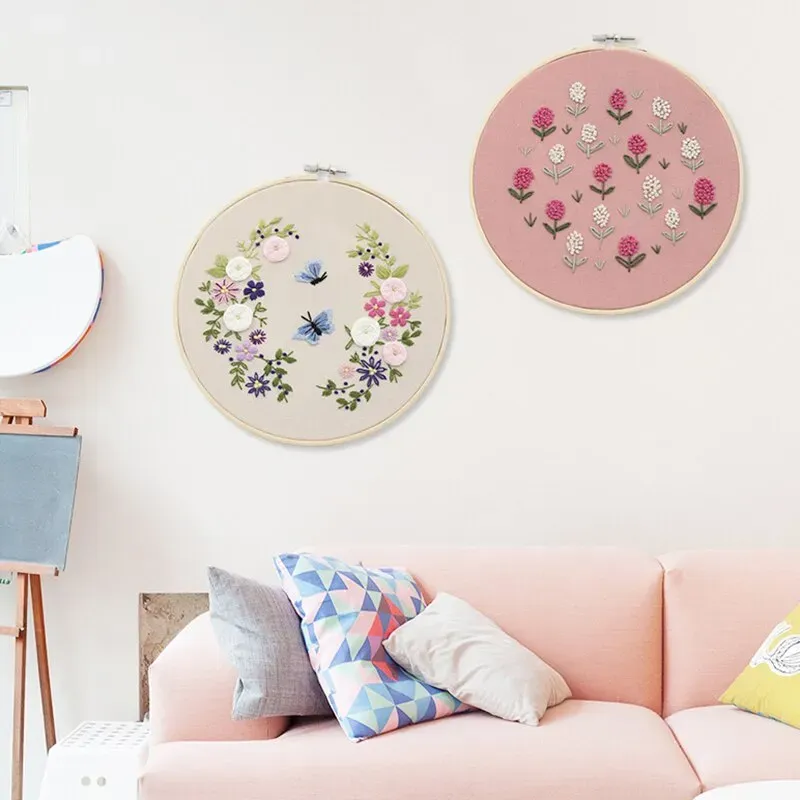
Discover how a 3D embroidery starter kit can unlock a world of dimensional fabric art, where stitches rise from the surface and ordinary textiles become sculptural, offering a tactile wow factor for home decor projects, accessories, or art pieces you can proudly display. Designed for beginners, this kit bundles essential tools, 3D embroidery tools, high-quality threads, practice fabrics, and clear step-by-step instructions plus quick-reference charts to jump-start your practice without hunting for compatible components. Choose a set that supports multiple layers and lift, and explore the idea of a 3D embroidery kit for beginners to understand the materials that make the most sense for your first projects, including stabilizers for 3D embroidery, foam padding options, and medium-weight stabilizers that keep shapes intact. You’ll also find guidance on selecting a good thread for 3D embroidery and practical 3D embroidery tips that help balance texture, color, lift, and height across your pieces as you grow more confident. With a well-chosen starter collection, setup is simple, progress is faster, and your early experiments can translate into polished, dimensional stitches that you can integrate into garments, home accents, or framed wall art, a thoughtful approach that minimizes waste and helps you build confidence with each raised element over time.
Seen through an LSI lens, this idea becomes a dimensional stitching starter set that emphasizes layered fabric sculpture and tactile texture. Instead of flat designs, you explore lifted stitches, volume, and shading as you assemble components that align with your first projects. For newcomers, a curated kit provides the backbone—ergonomic 3D embroidery tools, compatible stabilizers, and guided projects that teach you how to build height stitch by stitch. The approach favors clear, example-driven guidance and emphasizes practical milestones so you can progress from simple motifs to more ambitious sculptural pieces. As you grow, the same concepts extend to broader avenues of textile art, from wearable accents to wall hangings that cast subtle shadows and invite closer inspection.
Choosing the Right 3D Embroidery Starter Kit
Selecting the right 3D embroidery starter kit sets the tone for your learning curve. A well-rounded kit should bundle essential tools, an inviting selection of threads, suitable stabilizers, and beginner-friendly patterns or instructions. This cohesion helps you jump straight into layering, height, and texture without hunting for compatible components. By choosing thoughtfully, you’ll gain confidence as you explore the dimensional potential of fabric, thread, and imagination.
When evaluating options, look for a kit that clearly targets beginners and provides guided patterns or diagrams. A true 3D embroidery starter kit also aligns with the idea of a 3D embroidery kit for beginners, offering a structured path from first stitches to layered pieces. Clear instructions, a basic technique glossary, and a plan for your first 3D projects can make all the difference in your early results.
Essential 3D Embroidery Tools You’ll Need
The right tools matter as much as the threads you choose. A solid set of 3D embroidery tools—including sharp needles suitable for multiple fabric layers, a stable hoop or frame, and precise scissors—helps you manage height without snagging. Marking tools, such as water-erasable pens, let you plan where to place each raised element without leaving permanent marks.
Beyond basics, consider ergonomic handles and a few alternative needle sizes to accommodate different fabric weights. Having a few spare parts on hand—extra hoops, snips, and a compact seam ripper—keeps your workflow smooth as you practice lifting sections and building complex layers. You’ll also want to have a ready supply of a quality thread for 3D embroidery so you can preview how different tools interact with your chosen materials.
Stabilizers that Make 3D Embroidery Pop
Stabilizers for 3D embroidery are the backbone of dimensional stitching. They prevent fabric distortion as you lift and layer elements, enabling clean edges and pronounced height. Expect a mix of tear-away or wash-away stabilizers, plus mediums that provide support during the stitching process, so your figures hold their shape post-assembly.
Backing options also matter: lightweight and medium-weight stabilizers help maintain form when constructing raised shapes like petals or sculpted leaves. Some kits include adhesive stabilizers or temporary sprays to hold layers in place, reducing shifting as you build dimension. The right stabilization strategy keeps your pieces crisp from first stitch to finished display.
Selecting the Thread for 3D Embroidery
The thread you choose defines the volume, texture, and depth of your 3D embroidery. A good mix includes cotton floss or embroidery floss in multiple weights, along with specialty threads such as rayon or metallics to add shine and emphasis to raised areas. The thread for 3D embroidery should complement your stabilizers and layers, allowing you to build dimension without sacrificing control.
Experimenting with fiber blends and varying thicknesses helps you sculpt shading and form. Using a combination of smooth and textural threads creates natural highlights and shadows, enhancing the three-dimensional effect. Planning color transitions and thread choices ahead of time supports cleaner, more dramatic results in your projects.
Techniques to Create Lift and Layered Depth
3D embroidery tips focus on controlled elevation and thoughtful layering. Start by building a base layer, then stack tubes or wrapped stitches to create height, refining your technique with each added layer. Alternating stitch directions helps avoid flat spots and adds surface interest as you gain confidence in massing threads.
To emphasize depth, consider tools like foam under selected shapes or hollow-beading where you stitch along the edge and leave the center open. Color transitions and subtle weight changes between layers create a lifelike sense of volume. With practice, these approaches transform simple motifs into sculptural embroidery that truly stands out.
Practice Projects, Guidance, and Care for Longevity
Guided practice projects, such as a simple three-layer flower, give you a concrete path from plan to finish. Start with a basic motif, secure the base with a stable backing, and progressively add raised layers to explore height and texture. Clear, step-by-step guidance helps you internalize the rhythm of layering, tension, and color balance.
Care and maintenance extend the life of your dimensional pieces. Follow thread manufacturer guidelines for washing and drying, store finished pieces flat or mounted to prevent distortion, and repair loose threads promptly. Keeping your projects in a stable environment preserves the 3D elements and ensures your stitches retain their lift and shape over time.
Frequently Asked Questions
What is a 3D embroidery starter kit and why should I start with one?
A 3D embroidery starter kit is a beginner-friendly bundle designed to teach dimensional stitching. It typically includes the right tools, a selection of threads for volume, stabilizers that lift stitches off the fabric, and clear instructions, so you can start layering immediately.
How does a 3D embroidery kit for beginners differ from standard embroidery kits?
A 3D embroidery kit for beginners focuses on height, layering, and guided projects, with more beginner-friendly patterns and stabilized components. It contrasts with standard kits by emphasizing dimensional techniques and lift, helping you learn faster.
What essential 3D embroidery tools should be included in a starter kit, and how do they support dimensional stitching?
Essential 3D embroidery tools in a starter kit usually include sharp needles, a sturdy embroidery hoop, scissors, and marking tools. These items help you stitch accurately, maintain fabric tension, and place raised elements cleanly for true dimension.
Which stabilizers for 3D embroidery are typically included in a starter kit, and why are they important?
Stabilizers for 3D embroidery in a starter kit may include tear-away, wash-away, and backing options, plus temporary adhesives. They support the fabric during stitching and preserve height, preventing sagging or distortion.
What thread for 3D embroidery should I use in a starter kit, and how do thread choices affect depth and texture?
Thread for 3D embroidery in a starter kit should include a mix of weights and finishes—cotton floss, embroidery floss, and perhaps metallic or rayon threads. Varied thread choices enable layering, shading, and volume, which create depth in raised elements.
What are some practical 3D embroidery tips to maximize results with a starter kit?
3D embroidery tips include starting with a simple motif, testing tension on scrap fabric, planning shading and height, using stabilizers, and keeping notes on what works. Following beginner-friendly patterns helps you build confidence and consistency.
| Key Point | Summary |
|---|---|
| What is a 3D embroidery starter kit? | A curated collection to introduce beginners to layered, dimensional embroidery, including essential tools, threads, stabilizers, and beginner-friendly patterns. |
| Why it matters for beginners | Consolidates all needed items in one place, helps avoid common mistakes, builds confidence, and teaches signature techniques that define 3D embroidery. |
| Core components: Tools | Needles, hoop/frame, scissors, marking tools; designed for ease of use and stable fabric handling. |
| Core components: Threads and materials | Multiple thread weights/finishes (cotton floss, embroidery floss, metallics); specialty threads for volume and texture. |
| Core components: Stabilizers | Tear-away or wash-away stabilizers, backing options, and adhesives to support layer lifting and fabric stability. |
| Guidance and project ideas | Beginner-friendly patterns, practice projects (flowers, leaves, geometric shapes), and troubleshooting tips. |
| How to choose the right kit | Consider skill level, tool quality, material mix, clear instructions, and budget/value. |
| 5 practical tips for getting the most from a kit | Start simple, test on scrap, plan shading/volume, use stabilizers, and document progress. |
| Techniques and tips to master | Layering for volume, creating lift, color/shading, and using foam or backing for 3D effect. |
| Guided practice project | A simple three-layer flower with steps from tracing to finishing. |
| Care and maintenance | Follow thread guidelines, gentle washing, proper storage, and careful repairs that don’t flatten 3D elements. |
| FAQ highlights | Software needs, fabric compatibility, project duration, and beginner-friendly patterns. |
| Where to buy and compare options | Check reviews, total material quantity, included tutorials, and updates in stabilizers/threads. |